As the weather cools and firewood season approaches, homeowners and professionals alike gear up for a busy season of cutting and splitting logs. A chainsaw is often the tool of choice for this task, but to ensure it operates at peak performance, routine maintenance is absolutely essential. Chainsaws that are properly maintained not only work more efficiently but are also significantly safer to use. With so much riding on proper function, a little attention to upkeep can go a long way in preventing breakdowns and injuries. In this blog, we’ll explore essential chainsaw maintenance practices, safe cutting techniques, and how to keep your equipment in top shape throughout the season.
Preparing Your Chainsaw for the Season
Before making your first cut, it’s crucial to perform a full inspection of your chainsaw. Whether your saw has been sitting in a garage for months or is still recovering from last season’s wear, a thorough check will reveal any issues that need immediate attention. Start by examining the chain for rust, dullness, or damage. A worn chain can easily snag or skip, increasing the chance of kickback. If the chain appears dull or uneven, it’s time to sharpen or replace it. For those uncomfortable doing this themselves, a professional chainsaw sharpening service can ensure precise, safe sharpening.
Next, inspect the bar and chain tension. A loose chain is dangerous and inefficient, while one that’s too tight can damage the bar. Clean out any debris from the bar groove and oil holes to ensure smooth operation. Chainsaw maintenance at this stage should also include checking the air filter and fuel lines. A clogged filter or brittle fuel hose can reduce performance or even stall the engine mid-cut.
If your chainsaw is gas-powered, don’t overlook the spark plug. Replacing a fouled or old spark plug can dramatically improve starting and power. This is also a great time to refill with fresh fuel and oil. Old fuel can gum up the carburetor, so starting with a fresh mix can save time and trouble. If the engine still won’t start or runs inconsistently, a visit to a small engine repair shop may be necessary.
Safe and Clean Cutting Practices
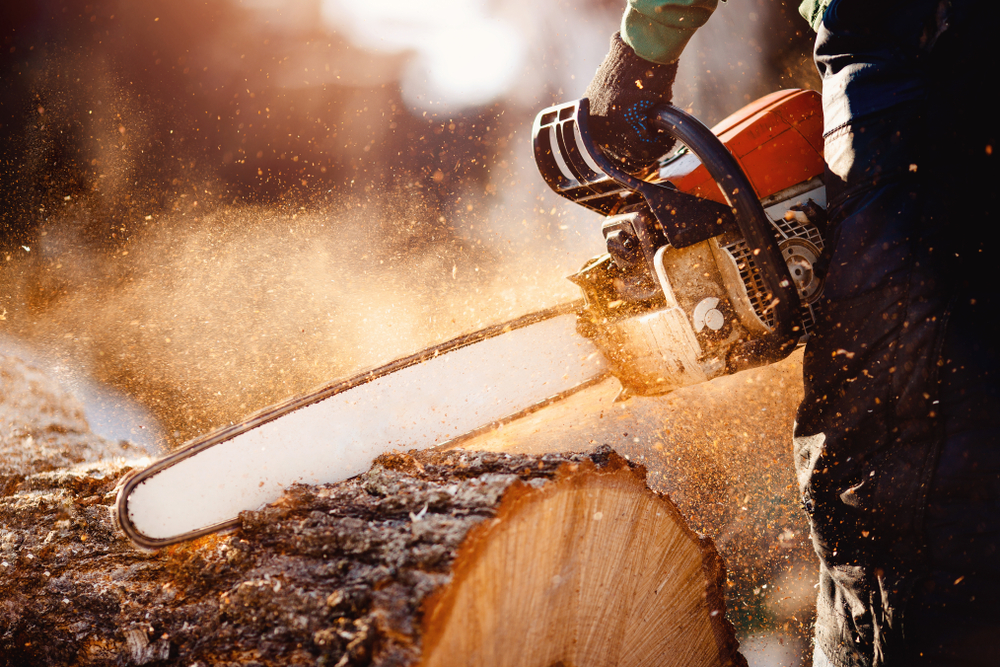
Once your chainsaw is ready, it’s time to focus on proper cutting techniques. Efficiency and safety go hand in hand when cutting firewood. Make sure to wear the appropriate safety gear, including chainsaw chaps, gloves, goggles, and hearing protection. A helmet with face shield is highly recommended, especially if working in wooded or uneven terrain.
Stabilize the log or tree trunk before cutting, and always maintain a firm grip on the saw with both hands. Use a stance that allows for balance and quick movement if needed. Position yourself slightly to the left of the saw to avoid the path of the bar in case of kickback. Avoid cutting above shoulder height or while on unstable surfaces.
Always cut with a sharp chain. A dull chain produces more sawdust than wood chips and requires extra force, increasing the chance of accidents. If your cuts are crooked or smoke is coming from the wood or chain, it may be time to revisit your sharpening routine or locate a local chainsaw sharpening service.
Cutting firewood also involves understanding wood grain and log placement. For optimal results, cut across the grain and segment logs into manageable pieces for splitting. Stack the wood properly to season it for winter use. Implementing these firewood cutting tips will not only save time but ensure your chainsaw endures through the season.
Keeping Your Chainsaw in Top Condition
Ongoing chainsaw maintenance throughout firewood season is just as important as preseason preparation. After every use, take time to clean off dirt, sap, and sawdust from the bar, chain, and air vents. Residue buildup can cause overheating and reduced performance. Inspect the chain tension regularly, especially after it cools from use, since metal can expand and contract with heat.
Lubrication is another essential factor. Make sure your oil reservoir is filled before each job. Running a dry chain can quickly damage both the chain and bar. Also, check the oiler mechanism to confirm it’s dispensing properly. If the bar looks dry after running, your oiler may be clogged or failing. This is one of the most common issues addressed at a chainsaw service and repair center.
For electric chainsaws, keep the battery terminals clean and store the battery at the manufacturer’s recommended temperature. For gas-powered models, clean or replace the air filter regularly to ensure proper airflow and combustion. Filters can clog quickly when cutting resinous or dirty wood, leading to poor engine performance.
Routine inspection of nuts, bolts, and anti-vibration mounts should not be overlooked. Vibration from cutting can loosen parts over time, leading to instability or dangerous failures. Tighten any loose components before starting a job. If you notice vibration increasing or hear odd sounds, it may be time to consult a professional at a chainsaw repair near me location.
Troubleshooting Common Issues
Even with the best care, chainsaws can develop problems during firewood season. Common issues include difficulty starting, poor cutting performance, and inconsistent idling. If your saw won’t start, start by checking the basics: spark plug, fuel, air filter, and carburetor settings. If it still won’t turn over, it may need more advanced attention from a small engine repair shop.
If the chain seems to skip or rattle while cutting, check for proper chain tension and ensure the drive links are seating correctly in the bar groove. A bent bar or worn sprocket can also cause uneven cutting. Chains that seem sharp but don’t cut effectively may be filed at the wrong angle, or the depth gauges may be uneven. These problems are best addressed through a qualified chainsaw sharpening service.
Poor lubrication can cause the chain to overheat, smoke, or dull quickly. Test the oiler by running the saw and watching for oil on a piece of paper or wood. If there’s no sign of oil, the oiler or oil filter may be clogged. Cleaning or replacing these parts can restore function, but if issues persist, professional chainsaw service and repair is recommended.
If your chainsaw cuts in a curve or binds mid-cut, check for uneven teeth lengths or damage to the bar rails. These can typically be corrected with professional help, although regular maintenance can often prevent them from occurring in the first place.
When to Seek Professional Help
Despite your best efforts, there will be times when DIY maintenance is no longer enough. Chainsaws are powerful, complex tools that can be dangerous if not operating correctly. Recognizing when to hand off your equipment to a professional is a vital part of responsible ownership.
If your chainsaw suffers from persistent mechanical problems or if you suspect internal engine damage, the smart move is to find a trusted chainsaw repair near me or take it to a certified small engine repair shop. These professionals can diagnose and resolve issues far beyond what basic tools and knowledge can handle.
Likewise, if your chain is repeatedly dulling or cutting improperly despite regular sharpening, it may be time to outsource the task to a chainsaw sharpening service. Expert sharpening not only restores the correct angle but also balances the teeth, improving cutting precision and reducing strain on the engine.
Many local chainsaw service and repair centers offer seasonal tune-ups, which include carburetor adjustment, full cleaning, part replacement, and performance testing. These services ensure your saw runs smoothly all winter long. Investing in professional maintenance can extend the life of your saw, reduce fuel consumption, and prevent expensive failures down the road.
Conclusion
Firewood season brings the promise of warmth and self-sufficiency, but it also demands reliable tools. Chainsaw maintenance is the key to cutting safely, cleanly, and efficiently throughout the colder months. From preseason inspections to ongoing care and knowing when to call in the professionals, every step matters. Proper sharpening, oiling, and tensioning not only preserve the saw’s life but protect your safety and productivity.
Should you run into problems that go beyond your skills or tools, professional help is always close by. Whether you need a chainsaw sharpening service, a quick fix from a small engine repair shop, or full chainsaw service and repair, investing in expert care ensures your chainsaw performs at its best when you need it most.
As you gear up for firewood season, make chainsaw maintenance a priority. A well-tuned saw not only cuts through wood with ease but also helps you work faster and safer. Keep your tools sharp, your gear clean, and your focus clear for a successful season of firewood cutting.
Winter may seem like the least likely time to think about lawn care, but for savvy homeowners and landscaping professionals, it’s actually the ideal season to get a head start. After the last leaves have fallen and your yard is tucked in for the colder months, your focus can shift from the turf to the tools that help you maintain it. One of the most important pieces of equipment in your arsenal is the lawn mower. Ensuring it’s ready for action as soon as the first warm day hits requires planning ahead. That’s why winter is the perfect time to perform lawn mower winter maintenance, schedule a lawn mower tune-up, and take care of any lingering issues with your equipment.
From leaf cleanup equipment to small engine service, every component of your mower deserves attention before spring rolls in. Many people wait until the last minute, leading to long lines at the local lawn mower repair shop and delays in getting their machines back in working order. Getting ahead of the rush not only saves time but extends the life of your machine. Here’s how you can take advantage of winter downtime and ensure a smooth start to spring.
Lawn Mower Winter Maintenance: Get Ahead While Others Wait
When your mower is no longer in use for the season, it may be tempting to push it to the back of the garage and forget about it until spring. However, neglecting winter maintenance can lead to problems when you’re ready to mow again. Cold weather, moisture, and inactivity can all contribute to the deterioration of internal components, especially if the mower isn’t properly cleaned and stored.
Begin by thoroughly cleaning your mower. Remove built-up grass clippings, debris, and residual dirt from the mower deck, blade, and engine area. Moisture trapped in this debris can lead to rust and corrosion. For those who have used their mower in conjunction with leaf cleanup equipment, there may be even more buildup to remove.
Next, empty the fuel tank or add a fuel stabilizer if you plan to leave fuel in the system. Old fuel can degrade and cause serious problems in the carburetor and fuel lines. Winter is also a good time to check the oil, change it if necessary, and replace the air filter. These small steps are the foundation of effective lawn mower winter maintenance and can prevent costly repairs later.
The Benefits of a Winter Lawn Mower Tune-Up
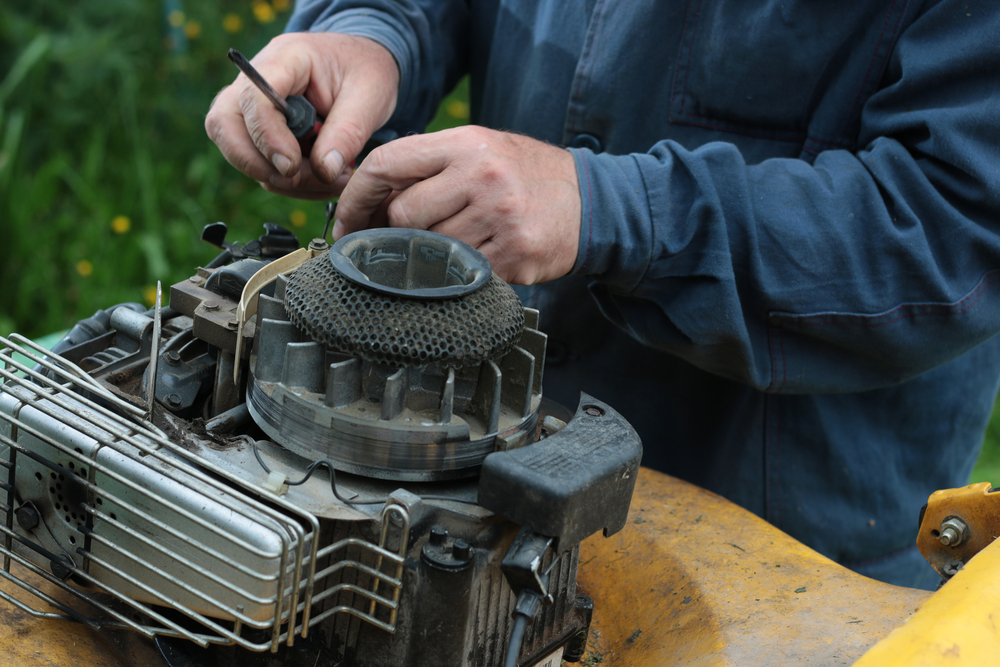
A professional lawn mower tune-up during the winter months is a smart investment. Most repair shops are less busy during the off-season, which means faster service and more thorough attention to your machine. A typical tune-up includes checking and replacing spark plugs, sharpening or replacing blades, cleaning or replacing the air filter, testing the ignition system, and inspecting belts and cables for wear.
Small engine service is particularly important during a tune-up. Many problems with mowers originate from neglecting the engine, which is the heart of the machine. During winter servicing, technicians will often flush the fuel system, clean the carburetor, and check compression to ensure the engine is operating efficiently. If you’ve noticed any issues during the mowing season, such as difficulty starting, power loss, or unusual noises, winter tune-ups are the best time to address them.
In addition to mechanical benefits, there’s also the peace of mind that comes with knowing your mower is in top condition. You’ll avoid the springtime scramble and be able to start your yardwork the moment conditions allow.
Small Engine Service: Why Timing Matters
Small engine equipment, including lawn mowers, snowblowers, and leaf cleanup machines, are prone to wear and tear over time. Consistent servicing ensures that they continue operating safely and effectively. Winter is an excellent time to schedule small engine service not just because shops are more available, but because the downtime allows for in-depth diagnostics that might be rushed during the busy season.
Engines that sit idle for months are vulnerable to fuel gumming, oil degradation, and condensation within the engine housing. Servicing your mower’s engine in winter allows technicians to replace old fluids, ensure moving parts are lubricated, and detect any early signs of trouble. If replacement parts are needed, ordering them during the slower months often results in quicker turnaround since suppliers and manufacturers aren’t backlogged with orders.
Additionally, if you’ve been using your lawn mower as a dual-purpose machine for leaf cleanup during the fall, the extra workload may have stressed the engine. A winter check-up can catch any resulting issues before they worsen. Taking advantage of this timing extends the life of your mower and helps avoid costly repairs or replacements.
Choosing the Right Lawn Mower Repair Shop in Winter
When deciding where to take your mower for service, look for a lawn mower repair shop with a strong reputation for quality and attention to detail. Winter offers the unique benefit of lower demand, meaning technicians often have more time to provide comprehensive service and may even offer discounts during the off-season.
Good repair shops will offer a full-service lawn mower tune-up as well as additional small engine services. Ask if they inspect belts, wheels, fuel lines, and safety features in addition to the usual engine and blade work. Many repair shops also provide helpful tips for how to prepare a lawn mower for spring, such as storage suggestions or how to restart a machine that’s been idle for months.
Some shops even offer pickup and drop-off services during winter, which is especially useful if your mower is too large or heavy to transport easily. Developing a relationship with a reliable repair shop during the slow season means quicker service in the spring when you may need emergency repairs or quick tune-ups to address new issues.
How to Prepare Your Lawn Mower for Spring: A Winter Checklist
Winter is your golden window for lawn mower preparation. While much of the work can be handled by professionals, there are also a few important steps homeowners can take themselves to prepare a lawn mower for spring. After cleaning and inspecting the mower, check the blade for dullness or damage. A sharp blade is crucial for clean, healthy cuts when mowing starts again.
Inspect the tires and handle any inflation or alignment issues. Tighten any loose bolts or fasteners that may have shaken loose over the previous season. If your mower uses a battery, disconnect and store it in a cool, dry place, and recharge it occasionally throughout the winter to extend its life.
If you’ve been using attachments like baggers, mulchers, or leaf cleanup equipment, make sure they’re cleaned and inspected as well. These accessories can harbor debris and moisture that leads to rust or mildew.
Storing your mower in a clean, dry area is the final step. Cover it with a breathable fabric cover to prevent dust buildup while allowing air circulation. Avoid plastic tarps, which can trap moisture and lead to corrosion.
By preparing your mower now, you’ll have the advantage once spring arrives. The first day of good weather won’t be spent troubleshooting a stubborn engine or replacing a corroded blade. Instead, you’ll be ready to get out there and get to work immediately.
Conclusion
Winter is often overlooked as a time for lawn care, but it’s the best season to focus on the equipment that makes spring and summer yard maintenance possible. From scheduling a thorough lawn mower tune-up to addressing any necessary small engine service, this quiet season provides the perfect opportunity to get ahead.
Your leaf cleanup equipment has worked hard during the fall, and now it’s time to give your lawn mower the attention it deserves. A bit of effort during winter ensures that your machine will be reliable, safe, and effective when you need it most. Don’t wait until spring to discover that your mower won’t start or that it needs major repairs. Visit a reputable lawn mower repair shop during the off-season and give your equipment the care it needs.
When you take the time to prepare your lawn mower for spring during winter, you’re not just saving time; you’re preserving the lifespan of your equipment and setting yourself up for a productive season ahead. Make winter maintenance part of your annual routine and enjoy the confidence that comes with being ready to roll the moment the grass starts growing.
As the leaves turn and the temperatures drop, many homeowners gear up for the annual ritual of firewood preparation. A reliable chainsaw is a critical tool in this process, making cutting, trimming, and bucking logs much easier and faster. But like any tool powered by a small engine, chainsaws demand regular upkeep and attention. Proper chainsaw maintenance is not only essential for performance but also for user safety and longevity of the tool. Whether you’re a weekend warrior stocking up firewood for winter or someone who uses a chainsaw professionally, keeping it in peak condition ensures a smoother and safer cutting season.
The Importance of Chainsaw Maintenance
Every machine with moving parts is subject to wear and tear, and chainsaws are no exception. The intense workload, exposure to dust, debris, and constant vibration can quickly take a toll. Regular chainsaw maintenance involves cleaning, lubricating, adjusting, and replacing parts as needed. Neglecting these responsibilities can lead to inefficient performance, breakdowns, and even hazardous situations.
A well-maintained chainsaw cuts cleaner and faster. It reduces the strain on the motor, conserves fuel, and protects you from dangerous kickbacks or unexpected shutdowns. For those relying on their equipment for firewood preparation, this means less time struggling with a dull chain or a stalling engine, and more time staying warm during winter.
Routine maintenance also extends the lifespan of the tool, saving money in the long run. Whether it’s sharpening the chain, changing the spark plug, or cleaning the air filter, a little care goes a long way in preventing costly chainsaw repair.
Troubleshooting Common Chainsaw Problems
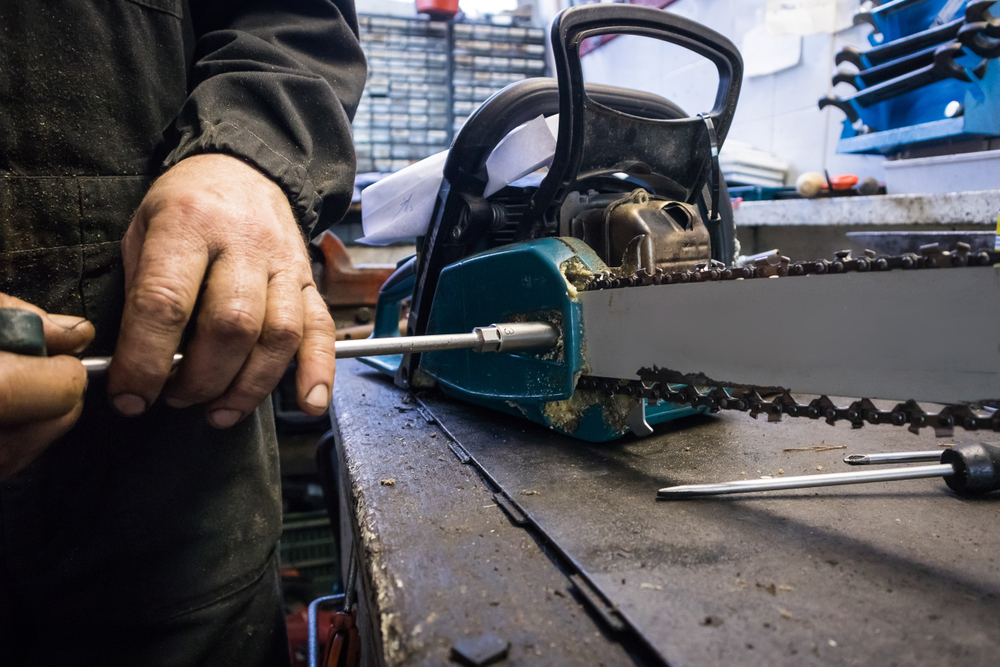
Even with diligent maintenance, chainsaws can occasionally run into issues. Some of the most common problems users face include difficulty starting the engine, reduced cutting power, or stalling during use. Recognizing these early signs and addressing them through proper chainsaw repair practices can prevent bigger problems down the line.
A chainsaw that won’t start may be suffering from a fouled spark plug, old fuel, or a clogged carburetor. Cleaning or replacing the spark plug and ensuring the fuel is fresh can resolve most starting problems. If the chain is dull or improperly tensioned, you’ll notice poor cutting performance. Re-sharpening or replacing the chain and adjusting the tension can bring it back to full functionality.
Inconsistent power or frequent stalling may point to issues with the fuel filter, air filter, or exhaust port. Each of these parts can become clogged over time and should be inspected and cleaned regularly. These small engine service tasks may seem minor, but they are vital to keep your chainsaw running smoothly and efficiently throughout the firewood season.
Preparing Your Chainsaw for Firewood Season
Firewood preparation often means working in cold, damp environments, which can affect both your equipment and your workflow. Before the season begins in earnest, it’s wise to perform a comprehensive tune-up on your chainsaw to ensure it’s ready for heavy use.
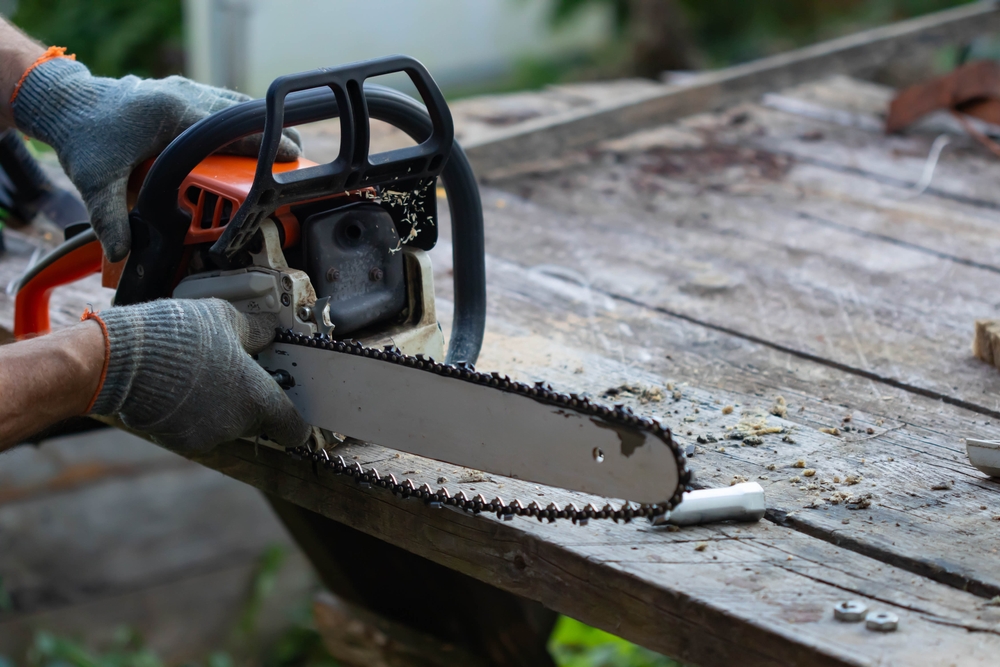
Start by inspecting the guide bar and chain for wear. The bar should be straight, and the chain should show no signs of damage or excessive dullness. Clean the oil ports and ensure the chain oiler is working properly to avoid overheating. Lubrication is essential in maintaining smooth operation and preventing premature wear on the chain and bar.
Check all fuel and oil lines for cracks or leaks. Replace any compromised lines to prevent dangerous leaks that could lead to engine failure or fire hazards. Make sure the air filter is clean and unobstructed, as a dirty air filter can significantly reduce engine efficiency and power.
Another crucial area is the chain brake. This safety feature is designed to stop the chain instantly in case of a kickback. Test the brake before starting your work to ensure it engages properly. Also, inspect the sprocket for wear and make sure the chain drive system moves freely without binding.
Before firing up your chainsaw for the first big cutting session, fill it with fresh fuel and bar oil. Allow it to warm up at idle speed to check for any abnormal sounds or behaviors. A few moments spent verifying performance now can save hours of downtime later.
Safety First: Best Practices for Chainsaw Use
Chainsaw safety is paramount. Each year, thousands of injuries occur due to improper use or poor maintenance of chainsaws. Most of these accidents are preventable with the right precautions and habits.
Before using the chainsaw, always wear proper personal protective equipment (PPE). This includes chainsaw chaps or pants, eye protection, hearing protection, gloves, and sturdy boots. Even experienced users can be caught off guard by a sudden kickback or slipping log.
Always operate the chainsaw with both hands firmly gripping the handles and maintain stable footing. Avoid cutting above shoulder height or using the tip of the saw, both of which increase the risk of kickback. Keep bystanders, especially children and pets, well away from the work area.
Make sure your chainsaw’s safety features are functioning correctly. The throttle lock, chain brake, and anti-vibration system are there to protect you. If any of these are malfunctioning, do not use the saw until they are repaired.
Regularly inspect the work area for hazards such as uneven terrain, hidden rocks, or dry brush that could ignite. Plan your cutting technique in advance, especially when felling trees or cutting large logs, to avoid getting the saw pinched or causing the wood to fall unpredictably.
When to Seek Professional Small Engine Service
While many maintenance tasks and minor repairs can be handled by the owner, some situations call for professional attention. If your chainsaw exhibits signs of major engine trouble, such as persistent stalling, smoking, or loss of compression, it may be time to visit a small engine service specialist.
Professionals can perform diagnostic tests and deep cleaning that go beyond routine care. They can also identify worn parts that may not be visible to the untrained eye. For newer chainsaws still under warranty, professional service ensures that maintenance complies with manufacturer guidelines, helping you retain coverage.
If you’re unsure about the right fuel mix, chain compatibility, or are facing ongoing operational issues despite your best efforts, don’t hesitate to consult a service center. Investing in expert chainsaw repair might cost a little more upfront, but it guarantees a safer and more reliable tool when you need it most.
Many small engine service shops also offer seasonal tune-up packages, which can be an excellent option as you prepare for firewood season. These typically include a full inspection, cleaning, and replacement of key components like the spark plug, air filter, and fuel lines.
Conclusion
A well-maintained chainsaw is your best ally during firewood preparation season. Taking the time to perform routine chainsaw maintenance not only protects your investment but also ensures a smoother, more efficient workflow and, most importantly, a safer operating environment. From checking chains and guide bars to cleaning air filters and replacing worn parts, every step contributes to a high-performing tool you can count on. And when in doubt, professional small engine service is always a worthwhile option. Remember, chainsaw safety begins with a properly maintained machine. With a little preparation and care, you’ll be ready to tackle any logpile with confidence and efficiency.
As the vibrant hues of autumn take over, the spectacle of falling leaves paints a picturesque scene. However, beneath the beauty lies the necessity of proper fall yard maintenance. Left unmanaged, fallen leaves can smother your lawn, impede healthy grass growth, and create conditions ripe for mold and pests. While a layer of leaves might seem harmless, it can trap moisture and block sunlight, leading to turf damage that’s often costly to reverse.
Homeowners who stay proactive with leaf cleanup not only preserve the aesthetics of their property but also contribute to a healthier yard in the seasons to come. A well-maintained lawn going into winter emerges stronger and more vibrant in spring. By taking time in the fall to manage leaf debris, you’re effectively protecting your investment in your landscape. Whether you’re maintaining a small yard or several acres, the key lies in having the right tools, techniques, and service support in place to make the job efficient and manageable.
Choosing the Right Tools for Efficient Leaf Cleanup
When it comes to tackling autumn leaves, the right equipment can transform hours of manual labor into a smooth, streamlined process. For those who prefer traditional methods, a sturdy rake remains a reliable tool, especially for smaller yards or tight spaces. However, as property size increases, relying solely on a rake becomes time-consuming and physically demanding.
That’s where modern tools like leaf blowers come into play. Whether you opt for a handheld electric blower for light-duty tasks or a gas-powered backpack model for larger areas, these devices significantly reduce cleanup time. A leaf blower can help move debris into manageable piles, making collection and disposal much easier. As powerful as they are, these machines require routine care and occasional leaf blower repair to maintain optimal performance.
For homeowners with significant tree cover, investing in a leaf vacuum or mulching mower might be worthwhile. These machines not only collect leaves but shred them into fine particles that can be used as natural mulch, adding nutrients back into your soil. To keep your equipment running smoothly throughout the fall, schedule regular lawn care equipment service, especially before the season begins.
Tips for Streamlining Your Fall Yard Maintenance Routine
Efficiency in fall yard maintenance comes from more than just owning the right tools. Timing, technique, and consistency play equally vital roles. Start your leaf cleanup early in the season and maintain a schedule that keeps buildup under control. Waiting until all leaves have dropped can make the job overwhelming, especially if the weather turns wet or windy.
Choose calm, dry days for cleanup. Wet leaves are heavier and more difficult to manage, potentially clogging leaf blowers and vacuums. Windy conditions can undo your progress in minutes. By planning your cleanup efforts around the weather, you save time and effort.
Focus on areas where leaf accumulation poses the greatest risk, such as around the base of trees, flower beds, driveways, and walkways. Leaves in these zones can become slippery or harbor pests. If you’re using a mulching mower, mow in different directions each time to ensure even distribution of nutrients from the shredded leaves.
For those with composting systems, collecting and storing dry leaves can be a valuable addition to your compost pile. Combined with grass clippings and kitchen waste, they help create rich organic matter for your garden. However, avoid composting diseased leaves or those treated with chemical pesticides, as they can contaminate the final product.
Maintaining and Repairing Lawn Equipment in the Fall
Like any hardworking tools, your leaf cleanup equipment demands regular attention to perform at its best. One of the most common challenges homeowners face during the season is a malfunctioning leaf blower. Whether it’s a clogged air filter, worn spark plug, or stale fuel, even minor issues can disrupt your routine. That’s why it’s essential to address leaf blower repair promptly to avoid extended downtime.
Before the season begins, inspect your tools thoroughly. Check for frayed wires, loose parts, and fuel or oil leaks. Clean filters, sharpen blades, and ensure all moving parts are lubricated. For gas-powered equipment, use fresh fuel and stabilize it if you plan on storing the tool for extended periods. Electric tools should have their cords inspected and batteries charged or replaced as necessary.
In many cases, professional lawn care equipment service providers can perform seasonal tune-ups, extending the life of your machines. These services often include blade sharpening, carburetor cleaning, and engine diagnostics. By investing in preventative maintenance, you reduce the likelihood of breakdowns at peak times.
Another critical aspect is small engine repair, which covers the engines powering leaf blowers, mowers, and chainsaws. These compact yet powerful engines require precise maintenance, and issues like poor starting, uneven running, or smoke emissions often indicate the need for expert service. Rather than replacing expensive equipment prematurely, a timely small engine repair can bring your tools back to full working order and save you money.
Leveraging Local Services to Make Cleanup Easier
For many homeowners, especially those managing large properties or juggling busy schedules, enlisting professional help can make a world of difference. Local leaf cleanup services specialize in seasonal yard care and bring both manpower and professional-grade equipment to the task. Hiring such services ensures your property is maintained consistently, often in less time than it would take to do the job yourself.
These professionals typically offer comprehensive packages that include raking, blowing, vacuuming, and hauling away leaves. Some even offer mulching and composting services, turning your yard waste into a valuable resource. Before hiring a provider, check reviews, request a detailed quote, and confirm they’re licensed and insured.
In addition to cleanup services, many local businesses offer equipment maintenance and repair. Having a trusted lawn care equipment service nearby means you can quickly resolve issues that arise with your leaf blower, mower, or other machinery. Many shops also stock replacement parts and accessories, so you can keep your gear in peak condition throughout the season.
Another benefit of working with local providers is their knowledge of regional foliage and soil conditions. They can offer insights into the best times to clean up, compost, or mulch based on your specific environment. Their experience with small engine repair also means you can extend the lifespan of your tools with expert care.
Conclusion
Fall doesn’t have to mean frustration when it comes to leaf cleanup. With the right combination of tools, techniques, and support, maintaining a clean and healthy yard becomes a manageable part of the season. Investing in quality equipment and staying on top of maintenance tasks like leaf blower repair and small engine service can keep your gear in top shape. Scheduling regular lawn care equipment service ensures smooth operation when you need it most.
Whether you take a DIY approach or rely on local professionals, prioritizing fall yard maintenance pays dividends throughout the year. A clean lawn going into winter sets the stage for a lush, green space come spring. And by managing your tools and scheduling necessary repairs ahead of time, you avoid unexpected setbacks and enjoy the season with peace of mind.
Leaf cleanup doesn’t have to be a dreaded chore. With a little preparation, some dependable equipment, and a support network of local services, fall yard maintenance can be simple, efficient, and even satisfying.
A chainsaw that doesn’t cut straight can turn a routine task into a frustrating experience. Whether you’re pruning trees, cutting firewood, or tackling a larger project, a misaligned cut isn’t just inefficient — it can also be dangerous. If you’re dealing with a chainsaw that veers off course, it’s important to understand the root causes and how to correct them. For homeowners and professionals alike, learning these solutions can save time, reduce wear and tear on your equipment, and even help avoid injuries.
For those located in or near Bells, TN, chainsaw repair and expert advice are closer than you think. Understanding why your chainsaw isn’t cutting straight is the first step toward getting your power equipment back in peak condition. Below, we’ll explore some of the most common chainsaw problems that can affect cutting accuracy, and we’ll offer practical fixes that work whether you’re doing it yourself or seeking out power equipment repair in West Tennessee.
Uneven Chain Sharpening
One of the most frequent reasons a chainsaw doesn’t cut straight has to do with how the chain is sharpened. Over time, as the chain dulls, users may sharpen the teeth inconsistently. When the cutters on one side are shorter or sharper than those on the opposite side, the chainsaw will naturally drift toward the side with the less aggressive cutters. This asymmetry causes the bar to veer off its intended cutting path.
If you’ve recently sharpened your chain and noticed that it started cutting crooked afterward, there’s a good chance uneven sharpening is the issue. Fortunately, this is a correctable mistake. Start by examining the chain closely. Look at each cutter’s length and angle. If you’re unsure what to look for, taking the saw to a shop that specializes in chainsaw repair in Bells, TN can help. Alternatively, you can resharpen the chain using consistent angles and pressure on both sides.
Mastering the art of sharpening your chainsaw chain can take time, but it’s essential for anyone who relies on the tool regularly. Use a guide or jig for precision, and remember to count the strokes on each tooth. For more chainsaw chain sharpening tips, consider reaching out to a local expert or attending a workshop offered by power equipment professionals in West Tennessee.
Worn or Damaged Guide Bar
Even if your chain is razor sharp and perfectly even, a damaged guide bar can still throw off your cuts. The guide bar is what holds the chain in place and ensures it runs smoothly along its path. Over time, the bar can develop uneven rails, wear on one side, or become bent. When this happens, the chain doesn’t move consistently, which causes it to deviate from a straight line during cutting.
Check the guide bar for signs of wear. You might notice that one side of the bar is more worn down than the other, or you may feel a slight bend when holding it up to eye level. Also inspect the bar groove, which can become clogged or distorted. If any of these signs are present, it might be time for repair or replacement.
Technicians skilled in power equipment repair in West Tennessee can inspect the bar using specialized tools to measure wear and straightness. If the bar is salvageable, they may be able to resurface it. If not, replacing it is the best option to restore the chainsaw’s cutting accuracy and efficiency.
Chain Tension Problems
Another common cause of a chainsaw not cutting straight is improper chain tension. A chain that’s too tight can strain the motor and reduce cutting ability. On the other hand, a loose chain can wobble and jump out of alignment, especially when cutting hardwood or at odd angles. Both situations lead to erratic cuts and can cause the bar to drift.
To test your chain’s tension, wear protective gloves and gently pull the chain away from the bar. It should have a slight give but should snap back into place without sagging. If it’s too tight or too loose, consult your saw’s manual for tensioning instructions or visit a local chainsaw repair shop in Bells, TN for assistance.
A well-tensioned chain reduces vibrations, improves accuracy, and extends the life of both the chain and the bar. Make it a habit to check the chain tension before every use, especially if the saw has been sitting for a while or if you’ve just changed the chain.
Worn Chain or Incorrect Chain Type
Sometimes, the chain itself is the problem. Like any cutting tool, chains wear out. A chain that has seen better days may have chipped teeth, worn links, or a damaged drive link, all of which contribute to crooked cuts. Additionally, using the wrong type of chain for your particular guide bar or cutting application can result in poor performance.
Check to make sure you’re using the correct chain pitch and gauge for your saw. Using the wrong combination can cause the chain to sit improperly on the bar, leading to uneven wear and poor cutting alignment. If you’ve replaced the chain recently, double-check the packaging and your saw’s specifications.
If you’re unsure about compatibility, bringing your equipment to a shop offering power equipment repair in West Tennessee is a wise move. Professionals can match your saw with the ideal chain and ensure it’s properly installed and adjusted.
Cutting Technique and External Factors
Even if everything mechanically checks out, the way you’re using your chainsaw can also affect cut quality. Holding the saw at an angle, using excessive force, or failing to stabilize the wood properly can all contribute to an uneven cut. Environmental factors, such as knots in the wood or uneven grain, can also play a role.
To cut straight, ensure you’re applying even pressure and letting the saw do the work. Avoid tilting the saw to one side, and always support the material you’re cutting so it remains steady. Experienced users know that finesse often wins over force when it comes to precision.
New users might benefit from watching experienced operators or taking a course that covers not only chainsaw chain sharpening tips but also proper cutting techniques. While technique is something that improves with time and practice, even seasoned chainsaw operators can develop bad habits. Taking the time to evaluate your method and refine your approach can make a big difference in cutting performance.
Conclusion
A chainsaw that doesn’t cut straight can signal several underlying issues, from simple user errors to more complex mechanical faults. Uneven sharpening, bar wear, improper tension, and even the type of chain used can all contribute to this frustrating problem. Fortunately, most of these issues are fixable with the right knowledge, tools, or assistance.
If you’re located near Bells, TN and need help diagnosing or fixing your chainsaw, professional chainsaw repair services are available to get your equipment back in top shape. Whether you’re seeking chainsaw chain sharpening tips or full-service power equipment repair in West Tennessee, don’t hesitate to reach out to local experts.
Keeping your chainsaw in prime condition isn’t just about performance; it’s also about safety. A properly maintained chainsaw cuts cleaner, lasts longer, and makes every job smoother. By addressing common chainsaw problems early and maintaining good cutting habits, you’ll ensure your saw stays a reliable tool for years to come.