When winter hits West Tennessee, residents of towns like Bells, TN know all too well the challenges that come with it. Ice storms can arrive with little warning, bringing power outages, impassable roads, and dangerous cold. Preparation is essential, especially when it comes to making sure your generator and other cold-weather equipment are ready to perform under pressure. Without proper maintenance, your outdoor power gear could fail just when you need it most. Here’s how to make sure you’re truly winter storm ready.
The Critical Role of Generators in Ice Storm Preparation
During an ice storm, one of the first things to go is often the power. Heavy ice accumulation can snap power lines and topple utility poles, plunging entire communities into darkness for hours or even days. In rural areas like Bells, TN, utility repair can take even longer due to widespread outages and treacherous road conditions.
This is where your portable generator becomes not just convenient but essential. Keeping your home warm, your fridge running, and critical appliances operational hinges on having a reliable source of backup power. However, relying on a generator that has not undergone recent portable generator maintenance is a gamble. It’s not uncommon for generators that have sat idle during warmer months to fail when suddenly called into action.
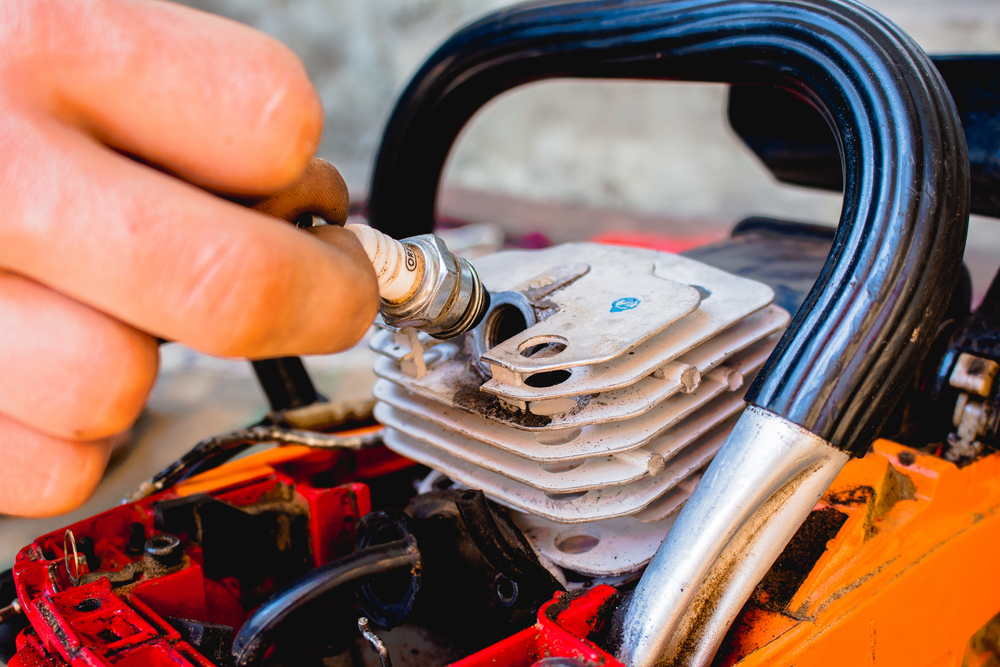
To avoid this risk, a full inspection of your generator is recommended before any major winter weather system arrives. This includes checking the fuel system, oil levels, spark plugs, filters, and running the generator under load to ensure functionality. If you’re unsure or notice issues, schedule a professional generator repair in Bells, TN to resolve any problems before the weather turns severe.
The Challenges of a Cold Weather Engine Start
Starting engines in freezing temperatures is notoriously difficult. Cold weather affects batteries, thickens oil, and increases the resistance in engine components. Whether it’s your generator, snowblower, or chainsaw, all gasoline-powered equipment will face added strain during a cold weather engine start.
One common issue is oil viscosity. If the oil in your generator or other machinery is too thick, it can make starting the engine difficult or even impossible. Switching to a winter-grade oil can help reduce this problem. Additionally, older batteries can lose up to 50% of their capacity in cold weather, making it harder to crank an engine. Testing and replacing weak batteries ahead of winter is another essential task.
Another helpful tip is to store equipment in a garage or insulated shed to keep it out of the bitter cold. If that’s not possible, using a block heater or even a heated engine blanket can significantly improve your chances of a successful cold weather engine start.
Winterizing Outdoor Power Equipment: What You Need to Know
Too many homeowners pack away lawn mowers and trimmers when fall ends and forget about the rest of their outdoor equipment. Yet properly winterizing outdoor power equipment is vital for ensuring it works when you need it and lasts for years to come.
Begin by draining fuel from any equipment that won’t be used for several months. Gasoline begins to degrade in as little as 30 days, and stale fuel can clog carburetors and fuel lines. For equipment you intend to use throughout winter, like generators or snow throwers, add fuel stabilizer to fresh gasoline and run the engine briefly to circulate the treated fuel.
Lubricating moving parts, checking belts and hoses, and cleaning off any dirt or debris also go a long way in preventing winter damage. If you’re storing any equipment outdoors, cover it with a heavy-duty tarp to protect it from ice, snow, and moisture.
Failing to winterize properly not only risks engine failure but can also void manufacturer warranties. Treat your equipment with the same care you’d give your car or HVAC system. Schedule winterizing services from trusted local professionals if you’re unsure how to do it yourself.
Generator Repair and Portable Generator Maintenance in Bells, TN
Whether your generator is a portable unit or a standby system hardwired into your home, regular service is the key to long-term reliability. Portable generator maintenance should be performed at least once a year, more often if the unit has seen heavy use. This includes changing the oil, replacing filters, cleaning spark plugs, and checking the fuel system for signs of leaks or corrosion.
If your generator is not performing as expected or refuses to start, it may be time for a generator repair. In Bells, TN, look for licensed technicians who specialize in small engine service and who are familiar with the common models used in the region. They’ll be able to test your generator under simulated load conditions and diagnose problems before they become critical.
Trying to troubleshoot or repair a generator on your own can be risky. Not only are you dealing with gasoline and electrical systems, but a mistake could lead to carbon monoxide leaks, fire hazards, or further equipment damage. For peace of mind and safety, rely on qualified professionals to handle any major repairs or inspections.
Ice Storm Preparation Beyond the Basics
Being winter storm ready means thinking beyond just power generation. Ice storms can immobilize entire areas, so preparing your property and supplies ahead of time can save you from major disruption.
Trim back any trees or limbs that overhang your home or power lines. Ice accumulation can cause branches to snap unexpectedly, damaging roofs, vehicles, or utility connections. Stock up on ice melt, sand, and snow removal tools before local supplies run out. Also, make sure your cold-weather gear, such as snow boots, insulated gloves, and thermal outerwear, is in good condition.
Make an emergency kit that includes flashlights, fresh batteries, bottled water, shelf-stable food, medications, and a backup phone charger. And, of course, keep enough fuel on hand for your generator, ideally stored safely in approved containers in a well-ventilated area.
If you have pets or livestock, make plans for their shelter and food supply as well. In towns like Bells, TN where agriculture is still a part of life, protecting animals during a freeze is a top priority.
Conclusion
Ice storms in West Tennessee are more than just inconvenient; they can be dangerous and even life-threatening without proper preparation. Your generator and outdoor power equipment are your first line of defense when the grid goes down and the temperature drops. By investing time in generator repair, winterizing outdoor power equipment, and understanding the unique challenges of a cold weather engine start, you give yourself and your family a much greater chance of staying safe and comfortable during winter weather events.
Portable generator maintenance is not something to put off until the first flakes fall. Taking action early, especially in towns like Bells, TN, where winters can be unpredictable, is the best strategy. When the next ice storm comes barreling through, you’ll be glad you were ready.
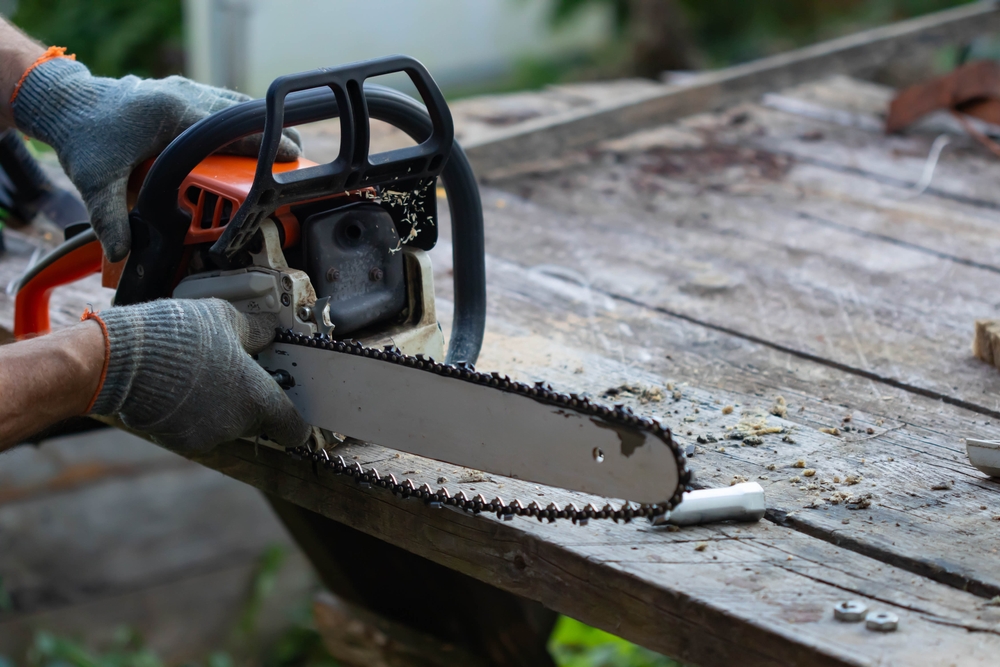
A chainsaw that doesn’t cut straight can turn a routine task into a frustrating experience. Whether you’re pruning trees, cutting firewood, or tackling a larger project, a misaligned cut isn’t just inefficient — it can also be dangerous. If you’re dealing with a chainsaw that veers off course, it’s important to understand the root causes and how to correct them. For homeowners and professionals alike, learning these solutions can save time, reduce wear and tear on your equipment, and even help avoid injuries.
For those located in or near Bells, TN, chainsaw repair and expert advice are closer than you think. Understanding why your chainsaw isn’t cutting straight is the first step toward getting your power equipment back in peak condition. Below, we’ll explore some of the most common chainsaw problems that can affect cutting accuracy, and we’ll offer practical fixes that work whether you’re doing it yourself or seeking out power equipment repair in West Tennessee.
Uneven Chain Sharpening
One of the most frequent reasons a chainsaw doesn’t cut straight has to do with how the chain is sharpened. Over time, as the chain dulls, users may sharpen the teeth inconsistently. When the cutters on one side are shorter or sharper than those on the opposite side, the chainsaw will naturally drift toward the side with the less aggressive cutters. This asymmetry causes the bar to veer off its intended cutting path.
If you’ve recently sharpened your chain and noticed that it started cutting crooked afterward, there’s a good chance uneven sharpening is the issue. Fortunately, this is a correctable mistake. Start by examining the chain closely. Look at each cutter’s length and angle. If you’re unsure what to look for, taking the saw to a shop that specializes in chainsaw repair in Bells, TN can help. Alternatively, you can resharpen the chain using consistent angles and pressure on both sides.
Mastering the art of sharpening your chainsaw chain can take time, but it’s essential for anyone who relies on the tool regularly. Use a guide or jig for precision, and remember to count the strokes on each tooth. For more chainsaw chain sharpening tips, consider reaching out to a local expert or attending a workshop offered by power equipment professionals in West Tennessee.
Worn or Damaged Guide Bar
Even if your chain is razor sharp and perfectly even, a damaged guide bar can still throw off your cuts. The guide bar is what holds the chain in place and ensures it runs smoothly along its path. Over time, the bar can develop uneven rails, wear on one side, or become bent. When this happens, the chain doesn’t move consistently, which causes it to deviate from a straight line during cutting.
Check the guide bar for signs of wear. You might notice that one side of the bar is more worn down than the other, or you may feel a slight bend when holding it up to eye level. Also inspect the bar groove, which can become clogged or distorted. If any of these signs are present, it might be time for repair or replacement.
Technicians skilled in power equipment repair in West Tennessee can inspect the bar using specialized tools to measure wear and straightness. If the bar is salvageable, they may be able to resurface it. If not, replacing it is the best option to restore the chainsaw’s cutting accuracy and efficiency.
Chain Tension Problems
Another common cause of a chainsaw not cutting straight is improper chain tension. A chain that’s too tight can strain the motor and reduce cutting ability. On the other hand, a loose chain can wobble and jump out of alignment, especially when cutting hardwood or at odd angles. Both situations lead to erratic cuts and can cause the bar to drift.
To test your chain’s tension, wear protective gloves and gently pull the chain away from the bar. It should have a slight give but should snap back into place without sagging. If it’s too tight or too loose, consult your saw’s manual for tensioning instructions or visit a local chainsaw repair shop in Bells, TN for assistance.
A well-tensioned chain reduces vibrations, improves accuracy, and extends the life of both the chain and the bar. Make it a habit to check the chain tension before every use, especially if the saw has been sitting for a while or if you’ve just changed the chain.
Worn Chain or Incorrect Chain Type
Sometimes, the chain itself is the problem. Like any cutting tool, chains wear out. A chain that has seen better days may have chipped teeth, worn links, or a damaged drive link, all of which contribute to crooked cuts. Additionally, using the wrong type of chain for your particular guide bar or cutting application can result in poor performance.
Check to make sure you’re using the correct chain pitch and gauge for your saw. Using the wrong combination can cause the chain to sit improperly on the bar, leading to uneven wear and poor cutting alignment. If you’ve replaced the chain recently, double-check the packaging and your saw’s specifications.
If you’re unsure about compatibility, bringing your equipment to a shop offering power equipment repair in West Tennessee is a wise move. Professionals can match your saw with the ideal chain and ensure it’s properly installed and adjusted.
Cutting Technique and External Factors
Even if everything mechanically checks out, the way you’re using your chainsaw can also affect cut quality. Holding the saw at an angle, using excessive force, or failing to stabilize the wood properly can all contribute to an uneven cut. Environmental factors, such as knots in the wood or uneven grain, can also play a role.
To cut straight, ensure you’re applying even pressure and letting the saw do the work. Avoid tilting the saw to one side, and always support the material you’re cutting so it remains steady. Experienced users know that finesse often wins over force when it comes to precision.
New users might benefit from watching experienced operators or taking a course that covers not only chainsaw chain sharpening tips but also proper cutting techniques. While technique is something that improves with time and practice, even seasoned chainsaw operators can develop bad habits. Taking the time to evaluate your method and refine your approach can make a big difference in cutting performance.
Conclusion
A chainsaw that doesn’t cut straight can signal several underlying issues, from simple user errors to more complex mechanical faults. Uneven sharpening, bar wear, improper tension, and even the type of chain used can all contribute to this frustrating problem. Fortunately, most of these issues are fixable with the right knowledge, tools, or assistance.
If you’re located near Bells, TN and need help diagnosing or fixing your chainsaw, professional chainsaw repair services are available to get your equipment back in top shape. Whether you’re seeking chainsaw chain sharpening tips or full-service power equipment repair in West Tennessee, don’t hesitate to reach out to local experts.
Keeping your chainsaw in prime condition isn’t just about performance; it’s also about safety. A properly maintained chainsaw cuts cleaner, lasts longer, and makes every job smoother. By addressing common chainsaw problems early and maintaining good cutting habits, you’ll ensure your saw stays a reliable tool for years to come.
Today, convenience often drives consumer choices. For residents in Bells, TN and across West Tennessee, the appeal of a one-stop big box store for outdoor power equipment purchases and service is easy to understand. However, when it comes to repair, maintenance, and keeping your equipment in peak condition, local service providers have a distinct edge. The difference isn’t just about where you take your lawn mower, chainsaw, or trimmer—it’s about the quality of care, personal attention, and long-term value you receive. Let’s take a closer look at why choosing a local outdoor equipment service is the smart move every time.
A Deeper Commitment to Customer Relationships
Local outdoor power equipment repair shops thrive on building and maintaining strong relationships with their customers. In smaller communities like Bells, TN, these businesses often know their customers by name, remember the history of their machines, and provide tailored recommendations based on years of interaction. When you walk through the door, you’re not just another repair ticket—you’re a valued member of the community.
This relationship-centered approach fosters trust. Customers feel confident that their service provider genuinely cares about the performance and longevity of their outdoor power equipment. That’s a stark contrast to the impersonal experience often found at big box store service desks, where high employee turnover and corporate policies can make customers feel like just another number. Over time, this personal investment from a local service shop leads to faster turnarounds, better communication, and a much higher likelihood that your repair will be done right the first time.
Expertise That Comes from Hands-On Experience
While big box stores may sell a wide range of outdoor power equipment, their in-house service centers often have limited technical expertise. The staff may be trained to handle basic maintenance or warranty claims, but more complex issues can easily be beyond their scope. Local outdoor equipment service providers, on the other hand, typically employ technicians with decades of hands-on experience. These professionals have worked on multiple brands and models over the years and are familiar with the quirks and common failures of each.
In West Tennessee, where seasonal changes and varied terrain place unique demands on equipment, having a repair technician who understands local conditions is invaluable. For example, they know the toll that humid summers take on engines or how wet springs can impact mowers. This experience leads to more accurate diagnoses, more efficient repairs, and valuable preventative maintenance tips that extend the life of your investment.
Faster Service and Greater Convenience
One of the major frustrations customers face with big box store service centers is the wait time. Equipment often has to be shipped to an offsite facility, adding days—or even weeks—to the repair process. In the middle of mowing season or when you rely on your tools for work, this delay can be costly and inconvenient.
Local outdoor equipment service shops, especially those in smaller towns like Bells, TN, are more agile. They can often complete repairs in-house, drastically cutting down turnaround time. Many even offer pickup and delivery options, making the process painless for busy customers. This speed isn’t just about convenience—it ensures your equipment is ready to perform when you need it most, preventing interruptions that can derail your lawn care or landscaping schedule.
Superior Parts Access and Tailored Recommendations
Another reason local service beats the big box competition is access to parts. Local repair shops often have established relationships with parts suppliers and manufacturers, allowing them to source components quickly and at competitive prices. They also tend to stock parts for the most popular brands used in the area, meaning you won’t be stuck waiting weeks for a shipment.
Beyond just replacement parts, local shops can recommend upgrades or adjustments based on how you use your outdoor power equipment. In West Tennessee, for example, they might suggest a specific blade type for tackling dense, humid-season grass or recommend an air filter upgrade to better handle dusty conditions. This kind of personalized service simply isn’t possible in the more standardized, one-size-fits-all approach of big box stores.
Supporting the Local Economy While Getting Better Results
Choosing a local outdoor power equipment repair shop in Bells, TN doesn’t just benefit your tools—it benefits your entire community. Local businesses recycle revenue within the area, supporting other small businesses, creating jobs, and fostering community growth. Every time you choose a local service provider over a big box chain, you’re helping keep West Tennessee’s economy strong and vibrant.
What’s more, because local shops rely on their reputation to survive, they have a vested interest in delivering outstanding results. Word-of-mouth referrals are their lifeblood, so they can’t afford to cut corners. This translates into higher-quality service for customers and a level of accountability that big box stores simply can’t match.
Conclusion
So, while a big box store might be fine for purchasing new outdoor power equipment, when it comes to service and repair, nothing compares to the advantages of a local provider. From deeper customer relationships and unmatched expertise to faster turnaround times and community benefits, local outdoor equipment service in Bells, TN and across West Tennessee consistently delivers better value, reliability, and satisfaction. The next time your lawn mower sputters or your chainsaw stalls, skip the long lines and impersonal service—head straight to your trusted local repair shop and experience the difference for yourself.
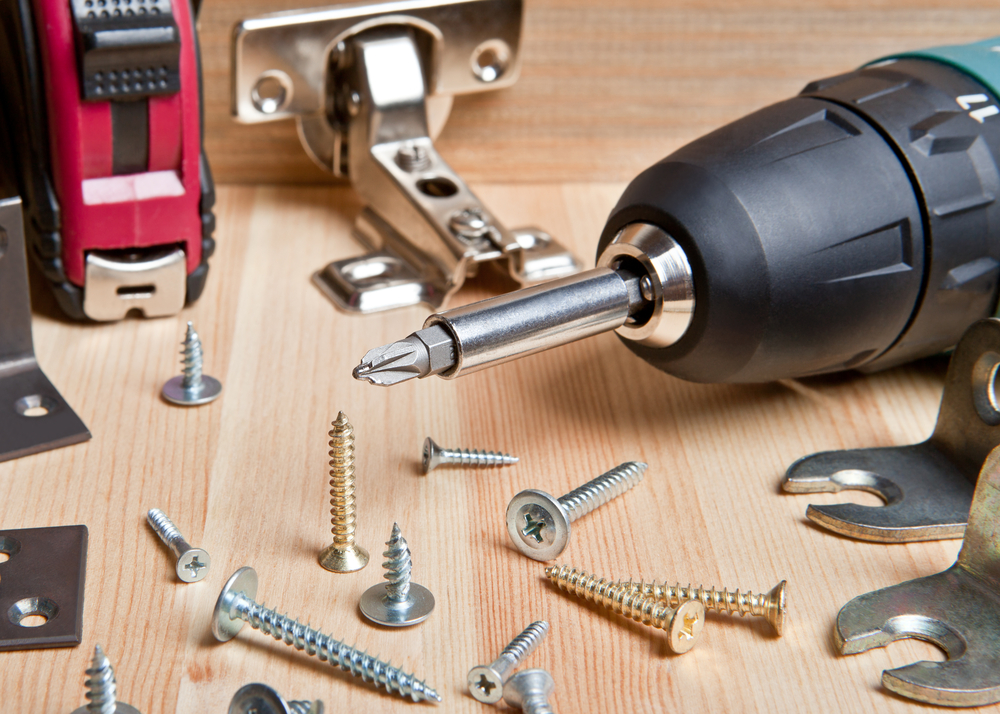
Transforming your outdoor space can be a rewarding project, especially when you’re armed with the right tools and creativity. Power tools can help you create custom outdoor furniture that’s both functional and visually appealing. Whether you’re designing a sleek, modern patio set or a rustic wooden bench, there’s no limit to what you can build with a few simple tools and the right materials. In this post, we’ll explore 10 creative outdoor furniture projects you can tackle with power tools, helping you bring your outdoor oasis to life. And if you find yourself in need of maintenance or repair for your equipment, a reliable power equipment repair shop in Bells, TN, can always assist you with getting back on track.
Building a Custom Adirondack Chair
A timeless classic, the Adirondack chair is a perfect project for anyone looking to upgrade their backyard seating. Using a saw, drill, and sander, you can craft these relaxing chairs from pressure-treated wood, cedar, or even recycled materials. The angled backrest and wide arms of an Adirondack chair provide both comfort and style, making it an ideal addition to any porch or patio. If you’re feeling ambitious, you can experiment with different finishes, such as staining or painting, to match the aesthetic of your outdoor space. While the construction itself is relatively simple, the end result will offer both functionality and a touch of luxury for your garden or deck.
DIY Outdoor Coffee Table
For many, the coffee table is the centerpiece of a living room. But did you know that you can create a stylish and functional outdoor coffee table with just a few tools? Start by selecting the right materials, such as reclaimed wood, to give your table a rustic, weathered look. A circular saw will help you cut the wood to size, while a drill is essential for assembling the frame. A sander can smooth the surfaces to perfection, giving the table a polished finish. To add durability, consider using weather-resistant outdoor sealants or paints. You can personalize your outdoor coffee table further by adding a storage compartment or a glass top for a more modern touch.
Outdoor Bench with Storage
Outdoor benches offer ample seating for gatherings while also providing a practical storage solution. Power tools like a miter saw, drill, and impact driver are perfect for cutting and assembling the parts of the bench frame. The addition of a storage compartment underneath the seat can help keep outdoor cushions, garden tools, or toys neatly tucked away. The key to a sturdy and lasting outdoor bench is the selection of materials that can withstand the elements. Opt for rot-resistant wood or composite materials to ensure your bench stays intact even through the harshest weather conditions. With a little creativity, you can build a comfortable and multi-functional piece of furniture that enhances your outdoor space.
Wooden Planter Boxes
Adding planter boxes to your outdoor furniture ensemble is a fantastic way to bring greenery into your design. A few simple cuts with a circular saw and some assembly with screws and wood glue can result in an eye-catching planter that’s perfect for housing your favorite flowers or herbs. The versatility of a wooden planter box allows you to design it in any shape or size, whether you want a long, rectangular box for a row of flowers or smaller, stackable versions for a variety of plants. After assembling your boxes, finish them with a protective sealant to prevent rot and extend their lifespan, ensuring your beautiful planters thrive throughout the seasons.
Pallet Patio Furniture
Repurposing wooden pallets for outdoor furniture is an eco-friendly and budget-conscious way to furnish your patio. With a few basic power tools, you can transform simple pallets into a variety of furniture pieces, from coffee tables to chairs and even full outdoor sofas. The first step is to disassemble the pallets using a crowbar or reciprocating saw. Then, you can customize each piece by sanding it down, painting it, or staining it to fit your outdoor décor. Adding cushions and pillows will increase the comfort level, and you can even attach wheels to the bottom of your creations for easy mobility. Pallet patio furniture allows for endless customization and can be a fun project to complete with friends or family.
Pergola with Built-In Seating
If you’re looking for an outdoor project that combines both beauty and utility, building a pergola with built-in seating is a great option. Power tools such as a table saw, drill, and nail gun will help you build the frame for the structure, which can be made from pressure-treated wood or a more weather-resistant material like cedar or redwood. Once the basic framework is in place, you can add the slats for the roof and incorporate benches along the sides for additional seating. A pergola can provide much-needed shade on hot days while offering a welcoming space for outdoor dining or relaxation. Adding decorative elements such as climbing plants or string lights can further enhance the ambiance of your pergola.
Folding Outdoor Chairs
When it comes to versatility, folding outdoor chairs are a fantastic choice. Perfect for outdoor gatherings and easy to store away, these chairs are not only practical but can also be customized to your taste. Using power tools like a jigsaw and drill, you can create a folding chair design that is compact, sturdy, and stylish. Wood is an excellent material for these chairs, but you could also experiment with metal or other materials for a different look. After assembling the frame, sanding it smooth, and applying a weatherproof finish, you’ll have outdoor seating that’s easy to transport and store without compromising on comfort or style.
Outdoor Lounge Chairs
For those who want to kick back and relax in their backyard, an outdoor lounge chair is a must-have. Building one yourself gives you complete control over the design and materials used. A power saw will help you cut the frame pieces to size, while a drill will allow you to attach them together securely. You can design your lounge chair with a reclining back and wide armrests, adding cushions for comfort. For a more luxurious touch, you can even incorporate features like a built-in cupholder or adjustable headrest. Using weather-resistant fabrics for the cushions and treating the wood will ensure your lounge chair stands up to outdoor conditions.
Outdoor Bar Cart
If you love entertaining in your backyard, an outdoor bar cart can be a practical and stylish addition to your space. With a set of wheels, a few boards, and some basic power tools, you can create a movable bar cart perfect for holding drinks, glassware, and cocktail accessories. Use a circular saw to cut the boards for the shelves, and a drill to assemble the cart’s frame. A sanding block can help you smooth the edges, while a protective finish will ensure that your bar cart remains durable and resistant to the elements. This piece of outdoor furniture can add a touch of elegance to any backyard party while keeping drinks within reach.
Custom Hammock Stand
A hammock is a wonderful way to relax outdoors, but finding the perfect stand to support it can be tricky. By building your own custom hammock stand, you can ensure that it fits perfectly in your space and can withstand the weight and weather. Using power tools like a miter saw and drill, you can construct a sturdy frame from treated wood or steel pipes. Adding hooks and anchors will allow you to securely attach your hammock. You can also add a creative twist by painting or staining the wood to match your outdoor décor. With a custom hammock stand, you’ll have the ideal setup for lounging on warm afternoons and enjoying your outdoor retreat.
Conclusion
Building outdoor furniture with power tools is a rewarding and enjoyable experience that allows you to create custom pieces designed specifically for your outdoor space. Whether you’re designing a simple bench or an elaborate pergola, there are endless possibilities for DIY projects that can enhance your backyard. Remember, if your power tools ever need a tune-up or repair, a power equipment repair shop in Bells, TN, is a great resource to keep your tools in top condition. By investing a little time and effort, you’ll have a personalized outdoor sanctuary that you can be proud of.
Summer brings warmth, sunshine, and a flourishing garden, but it also comes with a need for consistent lawn care. A healthy, vibrant lawn doesn’t happen by accident, and the summer heat can often stress the grass if not managed properly. Whether you’re a seasoned gardener or a novice, knowing what to do during the hot months can make all the difference in your yard’s appearance. In this guide, we’ll walk you through the essential tasks to ensure your lawn remains lush and beautiful through the summer heat.
Understanding the Needs of Your Lawn During the Summer
The first step in summer lawn care is understanding how the season affects grass. As temperatures rise and rainfall decreases, grass faces stress from the heat and potential drought conditions. Different types of grass react to these conditions in different ways. Cool-season grasses, like Kentucky bluegrass and fescue, tend to go dormant in the heat, while warm-season grasses like Bermuda and zoysia thrive in the summer. Knowing which type of grass you have will help you tailor your lawn care routine accordingly.
During summer, grass requires more water and nutrients to maintain its health, especially in areas that experience extended periods of heat. The soil may dry out quickly, and without proper moisture, your lawn can become brown and patchy. Additionally, grass grows more quickly in the warm season, which means regular mowing is crucial to keep it from becoming overgrown. However, the stress of extreme heat can also damage the lawn, which is why it’s important to stay on top of care throughout the summer months.
Proper Watering Techniques for Summer Lawn Care
Watering is one of the most critical components of summer lawn care. The challenge is knowing how much and when to water. Overwatering can be just as damaging as underwatering, leading to root rot and other lawn diseases. On the other hand, inadequate watering can cause grass to dry out and die. The key is to water deeply but infrequently. Grass roots need deep moisture to thrive, and frequent, shallow watering encourages weak root systems.
Aim to water your lawn early in the morning, ideally between 4 a.m. and 10 a.m. This is when temperatures are cooler, and the grass has time to dry before evening. Evening watering can lead to fungal growth because the moisture stays on the grass blades overnight. A general rule of thumb is to water your lawn about one to two inches per week, adjusting depending on rainfall and the specific needs of your grass type.
To determine if your lawn is getting enough water, observe the grass. If it has a bluish tint, feels spongy underfoot, or shows signs of wilting, it may need more moisture. Also, avoid watering during the hottest parts of the day, as much of the water will evaporate before it can reach the roots.
Mowing Practices to Promote a Healthy Lawn
Mowing is an essential aspect of lawn care that goes beyond just aesthetics. Regular mowing helps your lawn grow thicker and healthier, but it’s important to follow proper mowing techniques to avoid damaging the grass. In the summer, you should mow your lawn more frequently to keep the grass at the right height and prevent it from becoming too long or overgrown.
The general rule is to never remove more than one-third of the grass blade’s length at a time. Cutting too much at once can shock the grass and lead to stress. For most grass types, the ideal height for mowing is between 2.5 to 4 inches, depending on the type of grass. Longer grass blades provide more shade to the soil, which helps retain moisture and prevents weed growth. If you cut the grass too short, it can expose the soil to the sun, causing the roots to dry out and making the lawn more susceptible to disease.
One thing to keep in mind is that during hot summer months, you may want to leave the grass slightly longer than usual. Taller grass helps to shade the roots and prevent moisture loss, which is essential for keeping your lawn healthy. Be sure to regularly sharpen your mower blades to ensure clean cuts, as dull blades can tear the grass, leading to brown, ragged edges.
Fertilization and Soil Care for Summer
Fertilizing your lawn is an important task for ensuring its long-term health, but it’s especially crucial during the summer months when the grass is actively growing. The right type of fertilizer can help your lawn maintain its vibrancy, but it’s important to avoid over-fertilizing, as this can lead to thatch buildup, which makes it harder for water and nutrients to reach the grass roots.
When choosing fertilizer, make sure it’s suitable for your specific grass type and the current season. For warm-season grasses, fertilization in the early summer (late spring to early summer) is key, as this is when they are growing most vigorously. For cool-season grasses, it’s best to wait until fall to fertilize, as their growth is slower in summer. A slow-release fertilizer can be a good option as it provides nutrients to the grass over an extended period without overwhelming it.
Besides fertilizing, it’s important to periodically test your soil’s pH and nutrient levels to ensure that it’s not too acidic or alkaline for the grass to thrive. A soil test will help you determine which specific nutrients your lawn may be lacking. In addition, aerating the soil once or twice a year can help improve root growth by allowing air, water, and nutrients to penetrate deeper into the soil. Aeration is particularly important if your lawn has heavy clay soil or experiences a lot of foot traffic.
Equipment Maintenance and Power Equipment Repair
Maintaining your lawn care equipment is an often overlooked but essential aspect of summer lawn care. Lawn mowers, trimmers, and other power tools are crucial for keeping your yard looking great, and ensuring that they’re in top working condition will make your job much easier. Neglecting your equipment can lead to poor performance and even costly repairs.
If you’re based in Bells, TN, finding a reputable power equipment repair shop nearby is key for maintaining your tools. Regular servicing of your lawn mower, for instance, will help ensure that it runs smoothly and efficiently. Common maintenance tasks include changing the oil, cleaning or replacing the air filter, and sharpening the blades. If you notice your mower isn’t cutting properly or is making unusual sounds, it might be time for a tune-up or repair. A well-maintained mower will help you achieve an even, professional-looking cut and avoid damaging your lawn.
If your mower or other lawn equipment breaks down unexpectedly, it’s essential to have a reliable power equipment repair shop nearby to handle any repairs. Whether it’s a minor fix or a more significant issue, having a go-to service provider can save you time and frustration during the busy summer months when your lawn needs constant attention.
Keeping up with the maintenance of your equipment also ensures its longevity, allowing you to enjoy your tools for many seasons to come. Be sure to follow the manufacturer’s recommendations for regular maintenance, and don’t hesitate to seek help from a professional if you encounter problems.
Conclusion
Summer lawn care may seem like a lot of work, but the payoff is a healthy, lush yard that can become the envy of the neighborhood. By understanding the needs of your grass, following proper watering and mowing practices, and ensuring that your soil and equipment are well-maintained, you can enjoy a vibrant lawn throughout the season. Whether you’re managing the stress of the heat or keeping an eye on your equipment, a little effort can go a long way in creating a beautiful, thriving outdoor space. If you’re unsure about any aspect of your lawn care or equipment maintenance, don’t hesitate to consult a professional, such as a power equipment repair shop in Bells, TN, to keep things running smoothly. Your lawn will thank you for it.