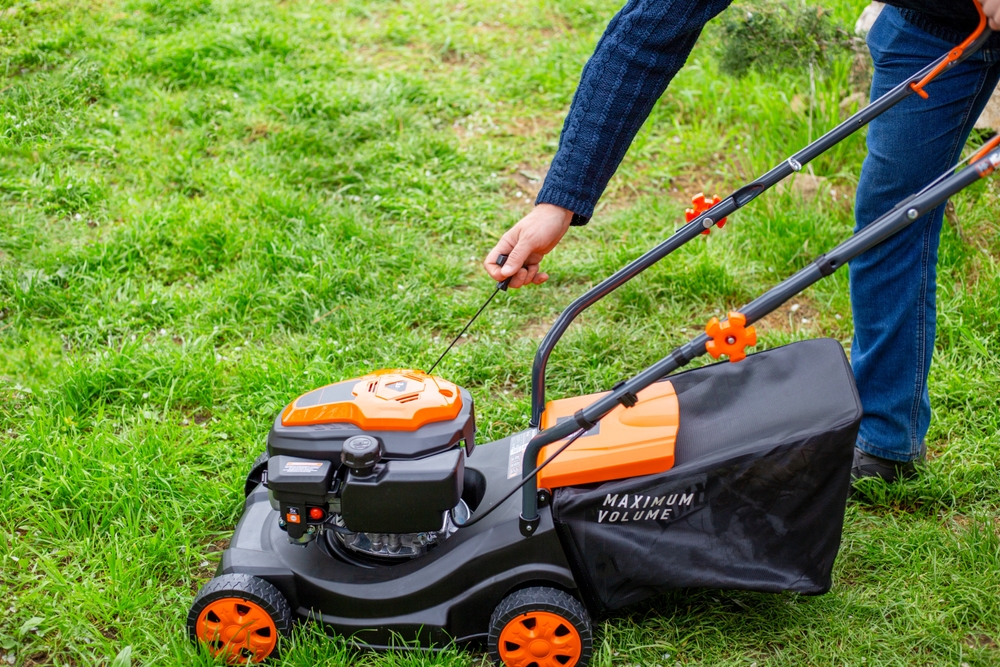
When the Tennessee sun beats down hard on Crockett County and the surrounding areas, your outdoor power equipment takes a beating right along with you. Homeowners and landowners in Bells, TN know firsthand how unforgiving the summer months can be, not just on the body, but on the machines that keep properties looking their best. Mowers, trimmers, blowers, and other small engine equipment are pushed to their limits during peak season, and without the right care, they can fail at the worst possible moment.
If you want to keep your equipment running strong all summer long, following a consistent maintenance routine is the key to avoiding costly breakdowns.
Why Summer Heat Is Especially Hard on Small Engines
Small engines are sensitive to extreme heat, and the summer conditions common to Crockett County create a perfect storm of stress for your equipment. High ambient temperatures force engines to work harder to cool themselves, and when airflow is restricted or cooling components are neglected, preventing engine overheating becomes a serious challenge. Engines that run hot for extended periods suffer accelerated wear on internal components, including pistons, rings, and valves. Over time, this wear leads to reduced power output, harder starts, and eventually full engine failure if the problem goes unaddressed.
Humidity adds another layer of difficulty. Moisture in the air can work its way into fuel systems and carburetors, causing gumming and varnish buildup that disrupts the precise fuel-to-air ratio your engine needs to run efficiently. Grass clippings, dust, and debris also accumulate faster during heavy mowing seasons, clogging cooling fins and air pathways that are critical to keeping operating temperatures in a safe range. Understanding these environmental factors is the first step toward protecting your investment and avoiding an emergency call to a small engine repair shop mid-season.
Essential Summer Mower Maintenance Tips to Follow Every Season
Sticking to a proactive maintenance schedule is the foundation of keeping your equipment healthy. One of the most important summer mower maintenance tips is to check and service your air filter on a regular basis. The air filter is your engine’s first line of defense against dust, pollen, and debris, and in the summer months, it gets dirty fast. A clogged filter starves the engine of clean air, causing it to run rich, overheat, and lose power. Air filter replacement should not be treated as an occasional task; depending on how frequently you mow and how dusty your conditions are, you may need to clean or replace the filter every few weeks during peak season.
Oil changes are equally important and often overlooked by homeowners who assume that a once-yearly change is sufficient. During summer, your engine burns through oil faster due to higher operating temperatures. Old or low oil loses its viscosity and lubricating properties, leaving metal components grinding against each other without adequate protection. Check your oil level before every use and change it according to your manufacturer’s recommendations, erring on the side of more frequent changes during the hottest months.
Fuel quality matters more than most people realize. If you are using ethanol-blended gasoline, be aware that ethanol attracts moisture and degrades faster than pure gasoline. Use fuel stabilizer in your tank if equipment will sit for more than a couple of weeks, and try to source the cleanest fuel available. Fresh fuel burns cleaner, starts easier, and puts less stress on the carburetor and fuel lines.
Cooling fins and engine housing should be cleaned regularly as well. Grass clippings and dirt pack into the fins and around the engine, acting as insulation and trapping heat where you least want it. A compressed air blower or a firm brush can clear these areas in just a few minutes and make a noticeable difference in operating temperature.
Sharpening Mower Blades and Why It Matters More in Summer
One of the most overlooked aspects of summer equipment care is blade condition. Sharpening mower blades is not just about getting a clean cut on your lawn; it is directly tied to how hard your engine has to work. A dull blade does not cut grass cleanly. Instead, it tears and rips the blades of grass, which requires significantly more power from the engine to push through the turf. That extra load translates directly into higher engine temperatures and increased fuel consumption.
During the summer, when grass grows quickly and you are mowing more frequently, blades dull faster than at any other time of year. A good rule of thumb is to inspect your blades every 20 to 25 hours of mowing time and sharpen them as needed. If you hit rocks, roots, or debris during a mowing session, inspect and sharpen the blades immediately, as impact damage can create nicks that tear rather than cut.
Blade balance is just as important as sharpness. An unbalanced blade causes vibration throughout the mower deck and engine, accelerating wear on spindle bearings, belts, and engine mounts. When sharpening, always check balance with a blade balancer or a simple nail through the center hole. If one side dips, remove a small amount of material from the heavy side until it hangs level. This small step extends the life of your entire mower significantly.
When to Call a Professional for Small Engine Repair
Even the most diligent homeowner will eventually encounter a problem that goes beyond routine maintenance. When your equipment starts showing signs of persistent trouble, including hard starting, loss of power, excessive smoke, or unusual noises, it is time to bring in a professional for small engine repair. Attempting to diagnose and fix carburetor issues, ignition problems, or internal engine damage without the proper tools and experience can turn a manageable repair into a much more expensive one.
Residents throughout Crockett County and in the Bells, TN area have access to skilled technicians who specialize in diagnosing and repairing all types of outdoor power equipment. A qualified small engine repair professional can perform a thorough inspection, catch problems you may not have noticed, and get your equipment back in service quickly. Seasonal tune-ups performed by a professional are also a smart investment, as they typically include a comprehensive inspection of all wear components, sharpening mower blades, replacing spark plugs, cleaning the carburetor, and setting engine timing and idle speed to factory specifications.
Do not wait until your equipment completely fails before seeking help. Catching a minor issue early almost always costs less than waiting until it becomes a major repair. If your mower struggled through last summer, scheduling a professional service appointment before the heat peaks is the smartest move you can make.
Conclusion
Maintaining your outdoor power equipment through the intense summer heat is not complicated, but it does require consistency and attention to detail. From air filter replacement and oil changes to sharpening mower blades and preventing engine overheating, each task plays a role in keeping your machines running reliably when you need them most. Homeowners in Bells, TN and throughout Crockett County who stay on top of these summer mower maintenance tips will spend less time dealing with breakdowns and more time enjoying a well-maintained property. When in doubt, a trusted small engine repair professional is always your best resource for keeping your equipment in peak condition all season long.
If you have spent time pushing or riding your mower across your yard only to look back and see ragged brown tips, scalped spots, or strips of uncut grass, you are not alone. This is one of the most common lawn care frustrations homeowners face, and the good news is that most of the causes are preventable and fixable. Whether you are in Bells, TN or anywhere else with a lush green lawn to maintain, understanding why your mower is performing poorly can save you time, money, and a lot of headaches.
1. The Most Overlooked Culprit: A Dull Mower Blade
The single most common reason for brown-tipped, torn, or ragged grass is a dull mower blade. Many homeowners assume their blade is fine as long as the mower runs and cuts, but that assumption leads to a lot of lawn damage over time.
A sharp blade slices cleanly through each grass blade, leaving a smooth, even cut that heals quickly. A dull blade, on the other hand, tears and shreds the grass instead of cutting it. That shredding action leaves jagged, frayed tips that dry out and turn brown within a day or two of mowing. If you have ever mowed your lawn and wondered why it looks tan and stressed just 48 hours later, dull mower blade symptoms are almost certainly the cause.
Lawn mower blade sharpening is not something most homeowners do often enough. Experts generally recommend sharpening your blade at least once per season, and more frequently if you mow a large property, run over rocky or sandy soil, or hit debris regularly. In Bells, TN and the surrounding region, where clay-heavy soils can hide rocks and roots, blades tend to dull faster than homeowners expect. If you are mowing an acre or more, sharpening two to three times per season is not overkill. It is just responsible lawn care.
When you inspect your blade, look for visible nicks, chips along the cutting edge, and a rounded or rolled edge rather than a clean bevel. Any of these are signs that lawn mower blade sharpening is overdue. Ignoring this step does not just affect appearance. It also stresses the grass, making it more vulnerable to disease, drought, and pest damage.
2. Your Mower Deck May Not Be Level
Even with a perfectly sharp blade, an unlevel mower deck will leave your lawn looking choppy, uneven, and inconsistent. Mower deck leveling is a step that often gets skipped entirely, especially by newer homeowners who assume the mower came ready to use right out of the box.
A properly leveled deck sits parallel to the ground, ensuring the blade cuts at the same height across its entire arc. When the deck tilts to one side, one part of the blade cuts lower than the other. The result is a lawn that looks like it was cut in diagonal strips, with alternating short and tall patches following each pass of the mower.
Mower deck leveling should be checked at the start of every season and any time you notice uneven cut patterns that cannot be explained by terrain alone. Most walk-behind and riding mowers have adjustment points that allow you to raise or lower individual sides of the deck independently. Consult your owner’s manual, park on a flat surface, and measure the blade height from the ground on both sides and front to back. Even a quarter-inch difference can produce noticeable striping in your lawn.
In Bells, TN, where lawns often include gentle slopes and varying terrain, getting your deck perfectly level is especially important. Mowing on a slope can also shift how the deck sits during operation, so checking the level after mowing hilly sections is a good habit to develop.
3. Mowing at the Wrong Height or Speed
Two of the most straightforward uneven grass cut causes are mowing too low and mowing too fast. Both mistakes are extremely common, and both can do real damage to your turf.
Cutting grass too short, often called scalping, removes too much of the leaf blade at once. The general rule in lawn care is never to remove more than one-third of the grass height in a single mowing session. When you cut more than that, you expose the lower stems and soil, which leads to browning, stress, and thin patches that invite weeds to move in. If you are seeing round or irregular brown patches after mowing, especially on higher spots in the lawn where the deck dips closer to the ground, scalping is likely the cause.
Mowing too fast is a related problem that many people do not connect to poor cut quality. When you push or drive a mower faster than the blade can efficiently process the grass, some blades get missed entirely, bent out of the way, or cut unevenly. Slowing down your pace, especially in thick or wet grass, gives the blade time to make a clean cut on every pass.
Raising your cutting height slightly and maintaining a steady, moderate mowing speed will eliminate a large percentage of uneven cut complaints without any mechanical changes at all.
4. Grass Conditions and Timing Play a Big Role
Sometimes the mower itself is not the problem. The condition of your grass at the time of mowing has a significant impact on cut quality, and this is an area where many homeowners in Bells, TN run into trouble during the humid summer months.
Wet grass is one of the biggest enemies of a clean cut. When grass blades are coated in moisture, they bend and clump rather than standing upright for the blade to slice. Wet clippings also stick to the underside of the deck, building up into a thick mat that reduces airflow, clogs the discharge chute, and forces the blade to work harder with less efficiency. The result is streaky, uneven cutting with clumps of wet clippings left scattered across the lawn.
Mowing early in the morning when dew is still heavy is tempting because of the cooler temperatures, but waiting until the grass has dried, typically by mid to late morning, produces a significantly better cut. Afternoon mowing is fine as long as the lawn is dry. Avoiding freshly irrigated grass is equally important if you run a sprinkler system.
Overgrown grass presents a similar challenge. If the lawn has gotten away from you and the grass is significantly taller than normal, a single pass at your standard cutting height will remove too much at once. Making two passes at progressively lower heights over a couple of days is a better approach for both cut quality and overall grass health.
5. Worn or Damaged Mower Components Beyond the Blade
Dull mower blade symptoms and deck leveling issues get most of the attention, but other mechanical problems can also produce uneven or damaged cuts. Worn spindle bearings, a bent blade adapter, loose deck belts, and damaged wheels or rollers can all contribute to inconsistent cutting performance.
A bent blade is particularly worth checking if you have recently hit a rock, root, or hard object while mowing. Even a slight bend that is invisible to the naked eye can throw the blade off balance, creating a vibration that translates into an inconsistent cut height. Running a bent blade also puts unnecessary stress on the spindle and engine, accelerating wear throughout the mower.
Checking your deck belts for cracking, fraying, or excessive slack is part of responsible lawn care maintenance. Loose belts cause the blade to lose rotational speed under load, which reduces cutting efficiency and can leave uncut patches, especially in thicker grass.
Conclusion
Most uneven patches and brown tips come down to a handful of fixable issues: dull blades, an unlevel deck, improper mowing habits, wet grass, or worn mechanical components. For homeowners in Bells, TN, staying on top of lawn mower blade sharpening and mower deck leveling each season will eliminate the majority of cut quality problems and keep your lawn looking consistently clean and healthy. A little preventive maintenance goes a long way in lawn care.
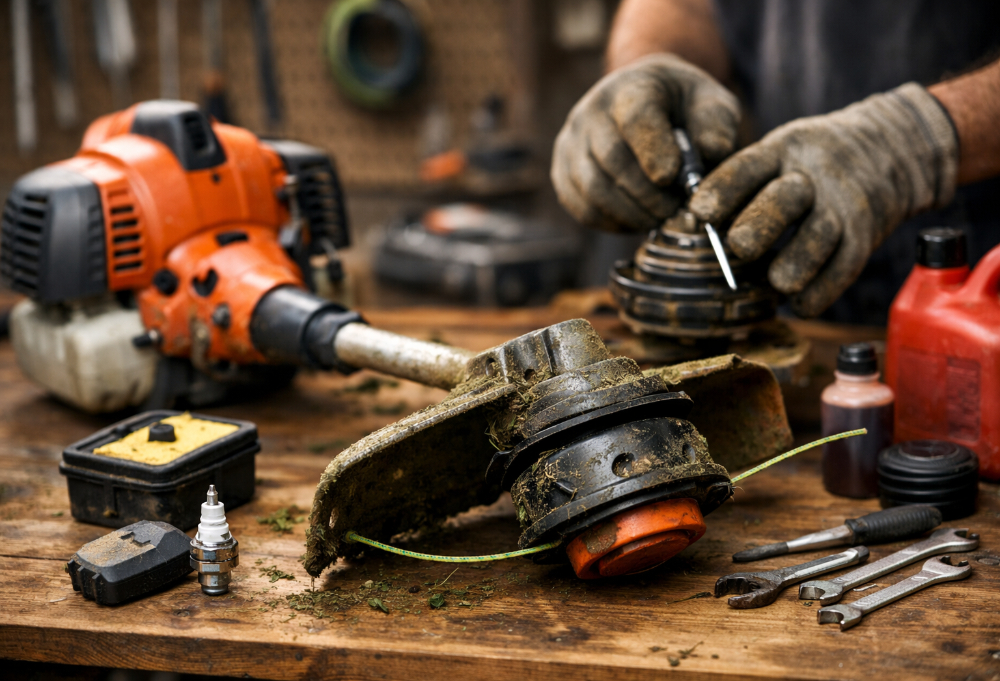
Whether you are a homeowner managing a tidy yard or a landscaping pro maintaining multiple properties across Crockett County, TN, knowing when your equipment needs professional attention can save you time, money, and frustration. String trimmer repair is not always a DIY project, and ignoring the warning signs can turn a minor fix into a costly replacement.
Here are five clear signs that your outdoor power equipment needs a professional tune-up before the next cutting season gets away from you.
1. Your Weed Eater Is Bogging Down Under Load
One of the most common complaints from string trimmer owners is a weed eater bogging down when it encounters thick grass or dense weeds. If your trimmer starts fine and runs smoothly at idle but then loses power or sputters the moment you put it to work, that is a textbook symptom of a fuel or carburetor issue. On a 2-cycle engine, this kind of performance drop often points to a clogged carburetor jet, a deteriorating fuel line, or a fuel mixture that is off balance.
In many cases, old fuel sitting in the tank over the winter months is the culprit. Ethanol-blended gasoline can break down and leave behind a gummy residue that clogs the small passages inside the carburetor. A professional 2-cycle engine service technician will clean or rebuild the carburetor, replace degraded fuel lines, and ensure your trimmer is running on the correct fuel-to-oil ratio. Do not ignore this symptom. A trimmer that bogs down under load is working harder than it should, and that puts extra wear on the entire engine over time.
2. The Engine Is Difficult to Start or Won’t Start at All
If you are yanking the pull cord five, ten, or fifteen times just to get your trimmer to fire up, something is wrong. A properly tuned string trimmer should start within a few pulls, especially once it has been warmed up. Hard starting is one of the most frustrating signs that your equipment needs professional outdoor power equipment maintenance, and it rarely resolves itself without intervention.
Hard starting on a 2-cycle engine can result from a fouled spark plug, a dirty air filter, a failing primer bulb, or carburetor issues similar to those that cause bogging. In some cases, the spark arrestor screen inside the muffler becomes clogged with carbon buildup, which restricts exhaust flow and prevents the engine from starting or running correctly. A trained technician can diagnose the root cause quickly and address it before the problem cascades into engine damage. Replacing a spark plug or cleaning an air filter might seem like a simple fix, but if the underlying cause is not addressed, the problem will return within a few uses.
3. You Notice Excessive Vibration or Unusual Noises
String trimmers naturally produce some vibration during operation, but if you start noticing shaking that feels abnormal or hear knocking, rattling, or grinding sounds, it is time to take the machine in for string trimmer repair. Excessive vibration can point to a bent or damaged drive shaft, a worn clutch assembly, or loose internal components that have worked themselves free over repeated use.
Unusual noises are often the first warning sign before something breaks entirely. A grinding noise could indicate that bearings are wearing out. A rattling sound might mean a heat shield or internal fastener has come loose. In either case, continuing to run the trimmer can transform a relatively inexpensive repair into a complete engine or drive shaft replacement. Residents and lawn care professionals in Crockett County, TN know that equipment downtime during peak cutting season is a serious problem, so catching these signs early is the smart play.
4. The Trimmer Is Leaking Fuel or Producing Excessive Smoke
A small amount of smoke on a cold start is normal for a 2-cycle engine, but if your trimmer is producing thick, ongoing smoke or you are noticing fuel leaking from the carburetor, primer bulb, or fuel lines, those are signs that should not be dismissed. Fuel leaks are both a performance issue and a safety hazard. Old, cracked fuel lines are a common source of leaks on trimmers that are a few years old, particularly if the equipment has been stored with fuel in the tank during the off-season.
Excessive smoke, particularly blue or black smoke, typically indicates a problem with the fuel mixture or combustion. Too much oil in the fuel mixture, a partially closed choke, or a clogged air filter can all cause a 2-cycle engine to run rich and produce heavy smoke. A professional 2-cycle engine service appointment will include inspection of all fuel system components, adjustment of the carburetor settings, and replacement of any cracked or deteriorated parts. Addressing these issues promptly also reduces emissions and keeps your outdoor power equipment running cleaner and more efficiently for the long haul.
5. The Cutting Head or Line Feed Is Malfunctioning
Sometimes the engine runs fine but the business end of the trimmer stops cooperating. If the cutting head is not advancing line properly, the automatic feed system is jamming repeatedly, or the head itself feels loose or wobbles during operation, those are signs that the trimmer needs professional attention. A malfunctioning cutting head not only reduces cutting efficiency but can also put undue stress on the drive shaft and engine.
In some cases, this is simply a matter of using the wrong size or type of trimmer line, which causes the feed mechanism to bind. In other cases, the head itself may be worn out or the internal spring and spool assembly may have failed. A professional technician can inspect the entire cutting head assembly, recommend the correct line type for your specific model, and either repair or replace the head as needed. For landscapers working in and around Crockett County, TN, having a reliable cutting head is just as important as having a well-tuned engine, because a trimmer that keeps jamming costs you time on every single job.
Conclusion
Your string trimmer is a hardworking piece of outdoor power equipment that deserves proper care and attention. If you are experiencing a weed eater bogging down, hard starting, excessive vibration, fuel leaks, or a malfunctioning cutting head, do not wait until the problem gets worse. Professional string trimmer repair and 2-cycle engine service can extend the life of your equipment, improve performance, and keep you working efficiently through the entire cutting season. For property owners and lawn care professionals in Crockett County, TN, bringing your trimmer in for a seasonal tune-up is a small investment that pays off every time you fire it up and get back to work.
If you’ve ever climbed onto your zero-turn mower and felt like you were riding a jackhammer through your yard, you know how unsettling excessive vibration can be. Beyond the discomfort, that shaking is usually a warning sign that something mechanical needs your attention. Whether you’re a homeowner in Bells, TN managing a few acres or a lawn care professional running a full schedule, zero-turn mower vibration is a problem that gets worse the longer you ignore it. Understanding the root causes can save you from a costly breakdown mid-season.
1. Bent or Unbalanced Mower Blades
The most common culprit behind zero-turn mower vibration is bent mower blades. When your blades take a hit from a rock, tree root, or hidden debris, they don’t always shatter or fall off. Sometimes they simply bend slightly, and that minor deformation is enough to throw the entire deck into an unbalanced spin.
Think of it like a ceiling fan with one warped blade. Even a subtle imbalance at high RPM creates a significant wobble that travels through the entire machine. When bent mower blades are spinning at full speed under your deck, every rotation amplifies the vibration and sends it straight up through the frame, into the seat, and through your hands on the controls.
Inspecting your blades should always be your first step when troubleshooting mower vibration. Disconnect the spark plug wire, tip the mower safely, and visually check each blade for bends, nicks, and uneven wear. A blade that looks straight to the eye can still be unbalanced, so using a blade balancer after sharpening is a smart habit. Replacing bent mower blades promptly is one of the most affordable fixes you can make, and it often resolves the shaking entirely.
2. Worn or Damaged Deck Spindles
If you’ve replaced your blades and the vibration continues, the next place to look is the deck spindles. The spindle is the housing and shaft assembly that each blade attaches to. It holds the blade in place, transfers the rotational force from the belt system, and keeps everything spinning true. When spindle bearings wear out or the spindle itself gets damaged, the blade no longer spins on a perfectly centered axis.
Deck spindle replacement becomes necessary when bearings are worn to the point that there is noticeable play in the shaft. You can often detect this by grabbing a blade (with the engine off and the spark plug disconnected) and trying to wiggle it up and down. Any movement beyond the tightest tolerance suggests the spindle bearing is failing. A grinding or rattling noise coming from beneath the deck while mowing is another strong indicator.
Delaying deck spindle replacement leads to more serious problems. A spindle that fails completely can allow a blade to drop or wobble severely, which can damage the deck housing, ruin the belt, and in worst-case scenarios, create a safety hazard. Lawn care professionals and homeowners near Bells, TN dealing with rough terrain or thick grass conditions put extra stress on spindles and should inspect them at the start and midpoint of every mowing season.
3. PTO Clutch Problems
The PTO (power take-off) clutch is the component that engages and disengages your mower deck when you flip the blade engagement switch. When the PTO clutch is functioning properly, you get a smooth engagement and consistent blade speed. When it starts to fail, the results can include erratic blade speeds, delayed engagement, and yes, significant zero-turn mower vibration.
PTO clutch troubleshooting can be a little more involved than blade or spindle inspection, but there are some clear warning signs to watch for. If your deck shudders when you engage the blades, or if the vibration only appears at certain engine speeds, the clutch could be slipping. A burning smell coming from beneath the deck during operation is also a red flag. The clutch relies on a precisely calibrated air gap between its components, and when that gap shifts due to wear, performance degrades quickly.
In some cases, PTO clutch troubleshooting reveals that the air gap simply needs adjustment rather than full replacement. However, once the clutch plate and coil are excessively worn, adjustment won’t be enough. Replacing the PTO clutch is a moderate-difficulty repair that many experienced homeowners can handle with basic tools, but if you’re not comfortable working around electrical connections and torque specifications, a local dealer or small engine repair shop can complete the job efficiently.
4. Loose or Damaged Deck Components and Belts
Sometimes zero-turn mower vibration isn’t coming from the spinning components themselves but from loose hardware around the deck. Over time, bolts that secure the deck to the frame can loosen from the constant vibration of normal operation. Anti-vibration washers and rubber isolators wear out and lose their ability to dampen movement. Even a slightly loose deck hanging unevenly will create imbalance at operating speed.
The deck drive belt is another component worth inspecting. A belt that is cracking, fraying, or glazed won’t transfer power smoothly. A belt that has stretched beyond its proper tension will slip against the pulleys, which creates vibration and uneven blade speeds. Idler pulleys can also wear out, and when their bearings fail, they introduce wobble into the belt path.
Walk around your mower and physically check each bolt on the deck hangers and lift linkage. Shake the deck gently by hand to feel for any looseness. Check the belt for visible wear and confirm that all pulleys spin freely without wobbling when rotated by hand. These are quick checks that can reveal easy fixes before you start pulling apart major components.
5. Engine Issues and Mounting Problems
While most vibration originates in the cutting deck, the engine itself can be the source. A single-cylinder engine on a zero-turn mower has an inherent vibration pattern, but when you add misfires, carburetor issues, or an out-of-spec ignition timing situation, that vibration becomes irregular and noticeably worse. Running a dirty or clogged air filter starves the engine of proper airflow, which affects combustion and introduces rough running.
Engine mounting bolts are another overlooked source of vibration. If the engine shifts even slightly on its mounting plate due to loose bolts, you’ll feel the entire machine shake more than usual. The fix here is straightforward: locate the engine mounting bolts, check the torque against your owner’s manual specifications, and retighten as needed.
Fuel quality also plays a role. Ethanol-blended gasoline absorbs moisture over time, and using fuel that has been sitting in a tank or gas can for more than 30 days can lead to rough combustion. Draining old fuel and running fresh gasoline with a proper fuel stabilizer is part of good seasonal maintenance that protects your engine and keeps vibration in check.
Conclusion
Zero-turn mower vibration is not something to push through and ignore. It is the machine telling you that something is off, and acting quickly keeps small problems from becoming expensive repairs. Whether the issue is bent mower blades, a spindle in need of deck spindle replacement, a PTO clutch requiring troubleshooting, loose hardware, or an engine concern, most causes are diagnosable with a careful inspection. For homeowners and lawn professionals in Bells, TN and surrounding areas, staying on top of these maintenance checks means fewer breakdowns, a better cut, and a longer-lasting machine.
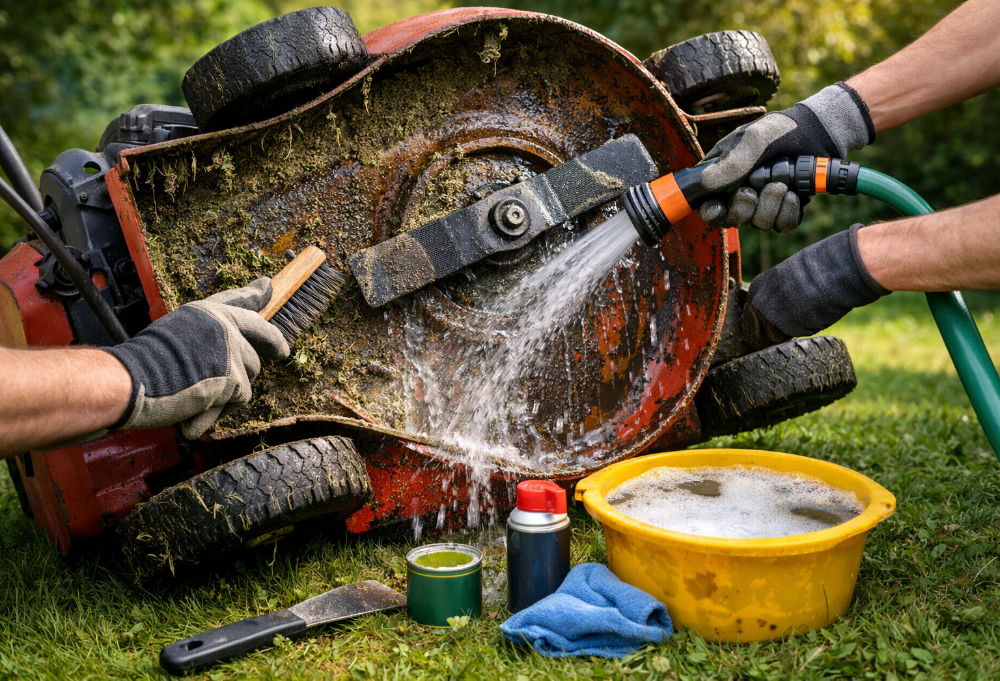
You already know that a well-maintained mower is the backbone of a great-looking yard. But while most homeowners remember to change the oil and sharpen the blades, one of the most overlooked aspects of lawn mower maintenance tips is keeping the underside of the deck clean. Grass clippings, moisture, and soil pack tightly under the deck after every mow, and over time, that buildup becomes a breeding ground for rust and corrosion.
Whether you are mowing in Bells, TN or anywhere else with a humid climate, learning the right way to go about cleaning lawn mower deck surfaces can extend the life of your equipment by years.
Why Grass Buildup Under the Deck Is More Dangerous Than You Think
Most people assume that a little grass stuck under the mower deck is harmless. The reality is far more damaging. When freshly cut grass clippings pile up under the deck, they trap moisture directly against the metal surface. That constant dampness, combined with the natural acids found in decomposing organic matter, creates a chemical environment that actively eats through metal coatings and bare steel alike.
Over time, you will start to notice orange and brown staining on the underside of the deck. Left untreated, surface rust deepens into pitting, which weakens the structural integrity of the deck itself. A compromised deck does not just look bad; it affects cutting performance, reduces airflow, and can even create safety hazards if the metal becomes brittle enough to crack under stress. This is why a consistent cleaning routine that prevents deck rust is not optional. It is a necessary part of responsible equipment ownership.
Beyond rust, thick clippings buildup reduces the aerodynamic efficiency inside the mowing chamber. Your blades rely on a specific airflow pattern to lift grass and discharge clippings cleanly. When that chamber is clogged, you get uneven cuts, clumping on the lawn, and added strain on the engine. The damage from neglect compounds quickly, and what starts as a minor inconvenience becomes an expensive repair.
What Tools and Supplies Do You Need Before You Start?
Preparation makes the entire cleaning process faster and safer. Before you flip your mower or tilt the deck for access, gather everything you need so you are not stopping mid-task to hunt for supplies.
You will need a stiff-bristled brush or a dedicated under-deck cleaning tool, a garden hose with a spray nozzle, a plastic scraper or putty knife, a bucket of warm soapy water, rubber gloves, and a dry cloth or shop towel. For rust prevention after cleaning, you will also want a can of rust-inhibiting spray or a silicone-based deck spray, both of which are widely available at hardware and farm supply stores.
An under-deck cleaning tool is especially useful if you have a riding mower or a zero-turn with a wide deck. These tools connect directly to your garden hose and shoot pressurized water upward through a built-in port on the deck, flushing out clippings without requiring you to tilt or tip the machine. Many modern mowers come with this port already installed, and if yours does not, aftermarket adapters are easy to find and inexpensive.
Always disconnect the spark plug wire before getting anywhere near the blade. This single step prevents the engine from accidentally starting while your hands are underneath the deck. Safety should always come first, no matter how routine the task feels.
Step-by-Step Process for Cleaning Lawn Mower Deck Surfaces
Once you have your tools ready and the spark plug disconnected, you are ready to start the actual cleaning process. If you are working with a walk-behind mower, tilt it carefully onto its side, making sure the carburetor side faces up to avoid fuel or oil from leaking into the air filter. For riding mowers, use the deck wash port if available, or raise the deck to its highest position and work from the side.
Begin by using your plastic scraper to loosen and remove the bulk of the dried clippings. Work in sections, scraping in the direction of the metal ridges to avoid gouging the surface. Do not use metal scrapers on painted decks, as they can scratch through the protective coating and expose bare metal to moisture.
Once the heavy buildup is removed, spray the entire underside with your garden hose to wash away loosened debris. Follow up with your stiff brush dipped in warm soapy water, scrubbing the entire surface thoroughly. Pay special attention to corners, baffles, and blade mounting areas, where clippings tend to pack the tightest.
Rinse completely with clean water and then dry the deck as thoroughly as possible using shop towels. Do not skip the drying step. Leaving water sitting on bare or scratched metal accelerates the exact corrosion you are trying to prevent.
Once dry, apply your rust-inhibiting spray or silicone deck coating evenly across the entire underside. This protective layer creates a barrier that sheds moisture and resists the acidic compounds in grass clippings. Some homeowners in high-humidity areas like Bells, TN prefer to reapply this coating at the start of every season for added protection.
How Often Should You Be Cleaning Your Mower Deck?
Frequency depends on how often you mow and the conditions of your lawn. As a general rule, a light cleaning after every two to three mowing sessions keeps buildup from hardening and becoming difficult to remove. A thorough deep clean, including scraping, scrubbing, and reapplying protective coating, should be done at least twice per season: once in the spring before heavy mowing begins and once in the fall before the mower goes into storage.
If you mow wet grass frequently, you should clean more often. Wet clippings stick far more aggressively than dry ones and begin decomposing faster, accelerating the rusting process. Homeowners who use mulching blades should also be more diligent, since mulching keeps clippings circulating under the deck longer before they discharge, which means more material accumulates on the deck surface.
Lawn mower maintenance tips from equipment manufacturers consistently emphasize seasonal inspections as part of a complete care routine. Checking the deck for rust spots, cracks, or areas where the protective coating has worn through takes only a few minutes but can prevent much larger repair costs down the road. If you catch surface rust early, a quick sand with fine-grit sandpaper followed by a coat of rust-inhibiting primer can stop the spread before it becomes structural damage.
Common Mistakes That Speed Up Rust and Corrosion
Even well-intentioned homeowners make a few key mistakes that undo their cleaning efforts. The first is storing a dirty mower. If you finish mowing and park the machine without cleaning the deck, you are giving clippings time to bond to the metal and begin the corrosion cycle overnight. A quick rinse after each use takes less than five minutes and makes a significant difference.
The second common mistake is using a pressure washer set too high. While pressure washing is effective for removing stubborn buildup, using excessive pressure can strip away paint and protective coatings, leaving bare metal exposed. Keep the pressure moderate and maintain a safe distance from the surface.
The third mistake is skipping the drying and coating steps after washing. Water left in seams and corners sits against the metal and does exactly what you were trying to prevent. Always dry thoroughly and seal with a protective product before putting the mower back into service.
Conclusion
A clean mower deck is one of the simplest and most effective ways to protect your equipment investment. By using the right under-deck cleaning tool, following a consistent routine, and applying protective coatings after each cleaning, you prevent deck rust before it starts. Whether you are a weekend warrior in Bells, TN or a lawn care professional, keeping your deck clean means better cuts, a longer machine lifespan, and fewer costly repairs over time.