Transforming your outdoor space can be a rewarding project, especially when you’re armed with the right tools and creativity. Power tools can help you create custom outdoor furniture that’s both functional and visually appealing. Whether you’re designing a sleek, modern patio set or a rustic wooden bench, there’s no limit to what you can build with a few simple tools and the right materials. In this post, we’ll explore 10 creative outdoor furniture projects you can tackle with power tools, helping you bring your outdoor oasis to life. And if you find yourself in need of maintenance or repair for your equipment, a reliable power equipment repair shop in Bells, TN, can always assist you with getting back on track.
Building a Custom Adirondack Chair
A timeless classic, the Adirondack chair is a perfect project for anyone looking to upgrade their backyard seating. Using a saw, drill, and sander, you can craft these relaxing chairs from pressure-treated wood, cedar, or even recycled materials. The angled backrest and wide arms of an Adirondack chair provide both comfort and style, making it an ideal addition to any porch or patio. If you’re feeling ambitious, you can experiment with different finishes, such as staining or painting, to match the aesthetic of your outdoor space. While the construction itself is relatively simple, the end result will offer both functionality and a touch of luxury for your garden or deck.
DIY Outdoor Coffee Table
For many, the coffee table is the centerpiece of a living room. But did you know that you can create a stylish and functional outdoor coffee table with just a few tools? Start by selecting the right materials, such as reclaimed wood, to give your table a rustic, weathered look. A circular saw will help you cut the wood to size, while a drill is essential for assembling the frame. A sander can smooth the surfaces to perfection, giving the table a polished finish. To add durability, consider using weather-resistant outdoor sealants or paints. You can personalize your outdoor coffee table further by adding a storage compartment or a glass top for a more modern touch.
Outdoor Bench with Storage
Outdoor benches offer ample seating for gatherings while also providing a practical storage solution. Power tools like a miter saw, drill, and impact driver are perfect for cutting and assembling the parts of the bench frame. The addition of a storage compartment underneath the seat can help keep outdoor cushions, garden tools, or toys neatly tucked away. The key to a sturdy and lasting outdoor bench is the selection of materials that can withstand the elements. Opt for rot-resistant wood or composite materials to ensure your bench stays intact even through the harshest weather conditions. With a little creativity, you can build a comfortable and multi-functional piece of furniture that enhances your outdoor space.
Wooden Planter Boxes
Adding planter boxes to your outdoor furniture ensemble is a fantastic way to bring greenery into your design. A few simple cuts with a circular saw and some assembly with screws and wood glue can result in an eye-catching planter that’s perfect for housing your favorite flowers or herbs. The versatility of a wooden planter box allows you to design it in any shape or size, whether you want a long, rectangular box for a row of flowers or smaller, stackable versions for a variety of plants. After assembling your boxes, finish them with a protective sealant to prevent rot and extend their lifespan, ensuring your beautiful planters thrive throughout the seasons.
Pallet Patio Furniture
Repurposing wooden pallets for outdoor furniture is an eco-friendly and budget-conscious way to furnish your patio. With a few basic power tools, you can transform simple pallets into a variety of furniture pieces, from coffee tables to chairs and even full outdoor sofas. The first step is to disassemble the pallets using a crowbar or reciprocating saw. Then, you can customize each piece by sanding it down, painting it, or staining it to fit your outdoor décor. Adding cushions and pillows will increase the comfort level, and you can even attach wheels to the bottom of your creations for easy mobility. Pallet patio furniture allows for endless customization and can be a fun project to complete with friends or family.
Pergola with Built-In Seating
If you’re looking for an outdoor project that combines both beauty and utility, building a pergola with built-in seating is a great option. Power tools such as a table saw, drill, and nail gun will help you build the frame for the structure, which can be made from pressure-treated wood or a more weather-resistant material like cedar or redwood. Once the basic framework is in place, you can add the slats for the roof and incorporate benches along the sides for additional seating. A pergola can provide much-needed shade on hot days while offering a welcoming space for outdoor dining or relaxation. Adding decorative elements such as climbing plants or string lights can further enhance the ambiance of your pergola.
Folding Outdoor Chairs
When it comes to versatility, folding outdoor chairs are a fantastic choice. Perfect for outdoor gatherings and easy to store away, these chairs are not only practical but can also be customized to your taste. Using power tools like a jigsaw and drill, you can create a folding chair design that is compact, sturdy, and stylish. Wood is an excellent material for these chairs, but you could also experiment with metal or other materials for a different look. After assembling the frame, sanding it smooth, and applying a weatherproof finish, you’ll have outdoor seating that’s easy to transport and store without compromising on comfort or style.
Outdoor Lounge Chairs
For those who want to kick back and relax in their backyard, an outdoor lounge chair is a must-have. Building one yourself gives you complete control over the design and materials used. A power saw will help you cut the frame pieces to size, while a drill will allow you to attach them together securely. You can design your lounge chair with a reclining back and wide armrests, adding cushions for comfort. For a more luxurious touch, you can even incorporate features like a built-in cupholder or adjustable headrest. Using weather-resistant fabrics for the cushions and treating the wood will ensure your lounge chair stands up to outdoor conditions.
Outdoor Bar Cart
If you love entertaining in your backyard, an outdoor bar cart can be a practical and stylish addition to your space. With a set of wheels, a few boards, and some basic power tools, you can create a movable bar cart perfect for holding drinks, glassware, and cocktail accessories. Use a circular saw to cut the boards for the shelves, and a drill to assemble the cart’s frame. A sanding block can help you smooth the edges, while a protective finish will ensure that your bar cart remains durable and resistant to the elements. This piece of outdoor furniture can add a touch of elegance to any backyard party while keeping drinks within reach.
Custom Hammock Stand
A hammock is a wonderful way to relax outdoors, but finding the perfect stand to support it can be tricky. By building your own custom hammock stand, you can ensure that it fits perfectly in your space and can withstand the weight and weather. Using power tools like a miter saw and drill, you can construct a sturdy frame from treated wood or steel pipes. Adding hooks and anchors will allow you to securely attach your hammock. You can also add a creative twist by painting or staining the wood to match your outdoor décor. With a custom hammock stand, you’ll have the ideal setup for lounging on warm afternoons and enjoying your outdoor retreat.
Conclusion
Building outdoor furniture with power tools is a rewarding and enjoyable experience that allows you to create custom pieces designed specifically for your outdoor space. Whether you’re designing a simple bench or an elaborate pergola, there are endless possibilities for DIY projects that can enhance your backyard. Remember, if your power tools ever need a tune-up or repair, a power equipment repair shop in Bells, TN, is a great resource to keep your tools in top condition. By investing a little time and effort, you’ll have a personalized outdoor sanctuary that you can be proud of.
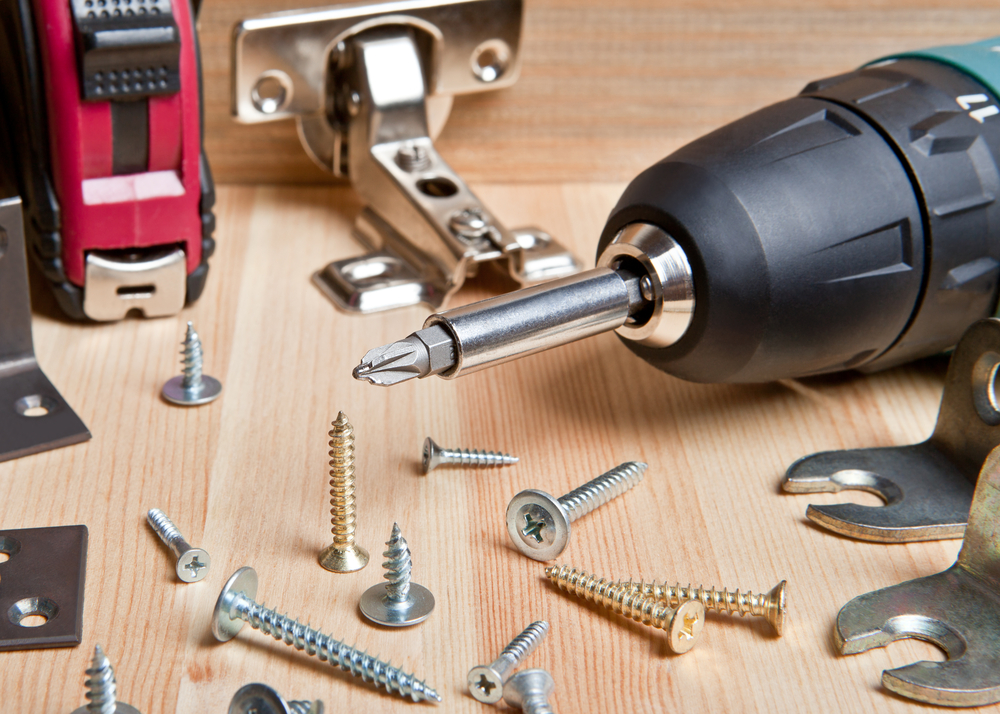
Power tools are an essential part of many home improvement, construction, and woodworking projects. From drills to saws, these tools make work easier, faster, and more efficient. However, to ensure that your power tools remain in top condition and continue to work effectively, it is important to clean and store them properly. Proper maintenance not only extends the life of your tools but also ensures they remain safe to use. In this guide, we’ll explore how to clean and store your power tools in a way that preserves their functionality and prevents damage over time.
Why Proper Cleaning and Storage Matter
Taking care of your power tools goes beyond just keeping them looking good. A well-maintained tool is more efficient and safe to use, which helps you get the most out of your investment. Additionally, improper storage can lead to rust, corrosion, and the deterioration of critical components. When power tools aren’t stored properly, they can be damaged by moisture, dirt, and debris. A poorly maintained tool could also present a safety hazard, with malfunctioning parts that could break or cause accidents. By cleaning and storing tools correctly, you prevent these issues and ensure your tools are ready when you need them.
A clean tool performs better and lasts longer, saving you money on repairs or replacements. If you don’t have the time to do this yourself, consider visiting a power equipment repair shop in Bells, TN, for professional help. They can ensure your tools remain in peak condition and advise on the best storage practices. However, regular cleaning and maintenance are simple enough to do on your own and don’t require expert assistance, allowing you to keep your tools in excellent working order.
Step-by-Step Cleaning Guide
Cleaning your power tools should be done regularly to avoid the build-up of dirt, grime, and debris that can affect performance. Here’s a step-by-step guide to cleaning common power tools:
Unplug or Remove the Battery: Before you start cleaning, always make sure the tool is not connected to power. If it’s a corded tool, unplug it from the socket. If it’s a cordless tool, remove the battery. This prevents accidents and ensures safety during the cleaning process.
Remove Dust and Debris: Using a soft cloth or brush, remove as much dust and debris from the tool as possible. For tools with vents or crevices, such as drills or saws, use a small brush or compressed air to blow out the dust. Avoid using excessive water, as this can damage electrical parts.
Wipe Down Surfaces: For a deeper clean, wipe down the exterior with a damp cloth. For stubborn stains or build-up, use a mild detergent mixed with water. Be sure not to soak the tool. Afterward, wipe it dry with a clean cloth.
Clean the Moving Parts: Lubricating moving parts like switches, gears, and blades is crucial to maintaining their smooth operation. Use an appropriate lubricant recommended for your specific tool. Be careful not to over-apply, as too much lubricant can attract dirt and dust.
Check for Wear and Tear: While cleaning, take a moment to inspect your tools for any signs of wear or damage. Look for frayed cords, worn-out blades, or broken parts that may need replacement. If you notice anything that could affect the tool’s functionality, visit a power equipment repair shop in Bells, TN, for repairs.
Clean the Battery Compartment: For cordless tools, clean the battery contacts regularly. Use a clean, dry cloth to wipe down the contacts, ensuring that dirt and moisture don’t interfere with the power flow.
Sharpen Blades and Bits: For tools like saws, drills, and other cutting equipment, sharp blades and bits are essential for efficient operation. Use a sharpening tool to restore the edge on saw blades and drill bits. If you’re unsure how to do this, take your tools to a professional for sharpening.
Best Practices for Storing Power Tools
Now that your tools are clean, it’s important to store them correctly to ensure they stay in good condition. Proper storage prevents damage and prolongs the life of your power tools. Here are some best practices to follow:
Keep Tools in a Dry, Cool Place: Moisture is one of the biggest enemies of power tools. Rust and corrosion can quickly form if tools are stored in humid or damp environments. It’s important to keep your tools in a dry, cool space, away from direct sunlight and temperature extremes. A well-ventilated garage or tool shed is ideal. If you must store your tools outdoors, make sure they are covered or kept in a waterproof container.
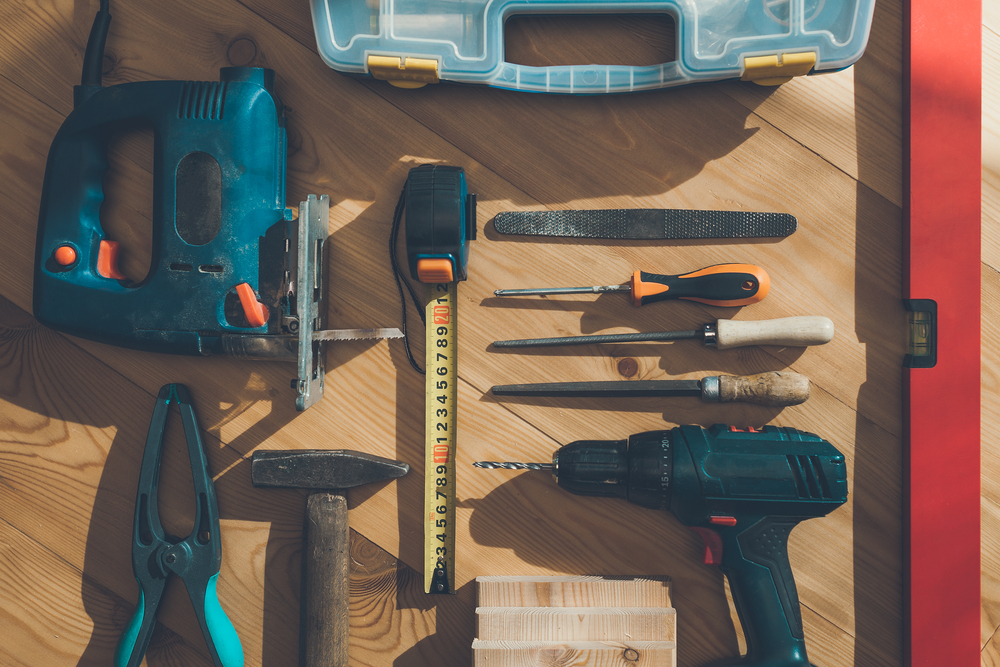
Use Toolboxes and Cabinets: A dedicated toolbox or tool cabinet is a great way to keep your power tools organized and protected. These storage solutions can help you keep tools separated, preventing them from coming into contact with one another and possibly causing damage. Look for storage units that offer compartments to keep small accessories, like drill bits or saw blades, organized.
Hang Tools When Possible: Hanging your power tools on pegboards or wall-mounted racks is a space-saving solution that also keeps your tools within easy reach. Hanging tools allows for better air circulation around them, preventing moisture build-up. Just be sure to hang tools securely to avoid accidents and to prevent damage to the tool itself.
Store Batteries Separately: If you’re storing cordless power tools, it’s best to remove the batteries and store them separately. Batteries should be stored in a cool, dry place away from direct sunlight. Do not leave them inside the tool, as this can cause the battery to lose its charge over time.
Cover Tools When Storing: Even if you store your tools in a dry, clean space, covering them can add an extra layer of protection. Consider using tool covers, or even simple dust sheets, to shield your tools from dust and debris that might settle over time. This is especially important for tools with delicate parts like drills or sanders.
Maintenance Tips for Longevity
While cleaning and storing your power tools properly is key to their longevity, regular maintenance is also crucial. Here are a few maintenance tips to keep your power tools running smoothly:
Inspect Tools Regularly: Regular inspections will help you catch small issues before they become major problems. Check for loose screws, damaged cords, or worn-out parts. Taking care of minor issues promptly can prevent more costly repairs down the line.
Calibrate Your Tools: For tools that require precision, like saws and drills, calibration is key. Over time, tools can become misaligned, affecting their accuracy and performance. If you’re unsure how to calibrate your tools, consult the user manual or take them to a power equipment repair shop in Bells, TN, for professional calibration.
Replace Worn Parts: Tools like drills, saws, and grinders have parts that wear out over time. Regularly replacing worn parts, like brushes, blades, or belts, ensures that your tools continue to function properly. Always use the recommended replacement parts to maintain optimal performance.
Sharpen Cutting Tools Regularly: Blades, bits, and other cutting tools lose their sharpness with use. Regular sharpening helps keep them in top shape and prevents strain on the tool’s motor. If you’re unsure about sharpening your tools, professionals can assist with sharpening services.
Test Tools Before Use: Before starting a new project, always test your power tools to ensure they’re functioning correctly. Make sure the motor runs smoothly, the tool is stable, and any attachments are securely in place. Testing before use prevents accidents and helps identify any issues early.
Seeking Professional Help
Sometimes, despite your best efforts, tools may break down or need more extensive repairs. If you notice any issues that you can’t address on your own, it’s always a good idea to seek help from professionals. A power equipment repair shop in Bells, TN, can offer expert repair services, from replacing faulty parts to complete overhauls of worn-out tools. Regular professional maintenance can also extend the life of your tools, keeping them in working order for years to come.
Conclusion
Cleaning and storing your power tools properly is essential for their longevity and performance. By taking the time to clean your tools after each use, store them in the right conditions, and perform regular maintenance, you’ll ensure that your power tools remain reliable and safe to use. When in doubt, professional help is available to address any issues you can’t fix on your own, ensuring your tools stay in excellent working condition for every project.
When it comes to maintaining the efficiency and longevity of your generator, one of the most crucial tasks you can perform is changing its oil regularly. Oil acts as the lifeblood of your generator, ensuring all moving parts are lubricated and functioning smoothly. Over time, oil becomes contaminated with dirt, debris, and other impurities that can compromise the generator’s performance. For those who rely on generators for backup power or for heavy-duty tasks, keeping the oil in top condition can make the difference between a machine that runs efficiently for years and one that breaks down prematurely. In this article, we will explore the importance of regularly changing your generator’s oil and how it helps maintain optimal performance. If you are unsure about the oil change process or need professional assistance, a reliable power equipment repair shop in Bells, TN can offer expert guidance and service.
Extending the Life of Your Generator
Regular oil changes are essential to extending the lifespan of your generator. Oil serves multiple functions, with the most important being its ability to lubricate the engine’s moving parts. Lubrication reduces friction, preventing the engine components from wearing down due to constant movement and heat buildup. Without adequate lubrication, parts like the pistons, crankshaft, and camshaft can experience premature wear, leading to engine damage and, eventually, a complete breakdown.
As oil ages and becomes contaminated, it loses its lubricating properties. Dirty oil can cause the engine to overheat, which can lead to internal damage. By changing the oil at recommended intervals, you ensure that the engine is always well-lubricated, operating smoothly, and free from harmful debris. In doing so, you not only improve the generator’s performance but also extend its overall lifespan, helping you avoid costly repairs or the need for a replacement. A power equipment repair shop in Bells, TN can help ensure that the oil change process is done correctly to optimize your generator’s life expectancy.
Maintaining Generator Efficiency
A well-maintained generator runs more efficiently, providing power when needed without consuming excess fuel or producing excessive noise. One of the key factors in maintaining efficiency is keeping the oil fresh. Over time, as oil becomes dirty and thickens, it can make the engine work harder. This can result in a reduction in the generator’s fuel efficiency, which means more fuel consumption for the same level of output.
Fresh oil helps reduce the friction between engine components, allowing the engine to operate more smoothly. With less friction, the engine can run more efficiently, using less fuel and producing less wear on its parts. Additionally, a generator with clean oil is less likely to overheat, as the oil also helps dissipate heat generated by the engine during operation. If your generator is constantly overheating or consuming too much fuel, it might be time to check the oil. A power equipment repair shop in Bells, TN can assist in diagnosing and resolving issues related to oil quality and its impact on efficiency.
Preventing Engine Damage
Failing to change the oil in your generator regularly can lead to serious engine damage. As oil ages, it becomes thick and sludgy, which can cause it to lose its ability to flow properly through the engine. This lack of proper oil circulation can lead to increased friction and heat buildup, which are the leading causes of engine wear and tear. Over time, the parts in the engine will begin to degrade, and you might notice issues like poor starting, strange noises, or a decrease in power output.
In extreme cases, neglecting to change the oil could lead to complete engine failure. Contaminants in old oil, such as dirt and metal shavings, can cause blockages in oil passages and restrict the oil from reaching critical parts of the engine. This can result in catastrophic damage that could have been easily avoided by simply changing the oil at regular intervals. A power equipment repair shop in Bells, TN can provide the maintenance services needed to ensure that the engine remains in good working order, helping you avoid the cost and hassle of major engine repairs.
Saving Money on Repairs
While changing the oil might seem like an unnecessary expense, it is actually a cost-effective way to avoid expensive repairs down the road. Regular oil changes are one of the easiest and most affordable forms of preventative maintenance. By keeping the oil clean and fresh, you reduce the likelihood of issues that could require costly repairs or parts replacements.
Generators can be expensive to repair, especially if the damage is severe. Engine components like pistons and valves can be costly to replace, and the labor involved in engine repairs can add up quickly. By regularly changing your oil, you’re investing a small amount of money in maintenance that can prevent much larger expenses in the future. Furthermore, maintaining your generator’s oil can help you avoid the potential need for an entirely new generator, which is an investment that can cost thousands of dollars.
Regular oil changes also help maintain the warranty on your generator. Many manufacturers require that you follow a specific maintenance schedule to keep the warranty valid. Failing to do so could result in the voiding of the warranty, leaving you on the hook for any repair costs. Therefore, by taking the time to change the oil as required, you are ensuring that your generator remains covered by its warranty, which could save you a significant amount of money in the event of an issue.
Ensuring Safety and Reliability
The most important aspect of a generator is its ability to provide reliable power when you need it most. Whether you rely on your generator for backup power during a storm or for running equipment on a job site, you need to be confident that it will perform without fail. Neglecting to change the oil can lead to unreliable performance, with the risk of breakdowns or poor output when you need the generator the most.
Generators that are not properly maintained are also more prone to safety issues. Overheated engines, for example, pose a fire risk, particularly if the oil is thick and unable to properly dissipate the heat. In addition, generators with poor lubrication are more likely to experience sudden and catastrophic failures, which could cause harm to the machine or surrounding equipment. Changing the oil regularly ensures that the generator is operating safely, reducing the risk of malfunction and keeping both the machine and its operator safe.
If you are unsure about how to change the oil in your generator or need assistance with maintenance, visiting a power equipment repair shop in Bells, TN can help. These professionals can offer advice and service to keep your generator running at peak performance, ensuring both safety and reliability.
Conclusion
Regularly changing the oil in your generator is a vital step in ensuring its long-term performance, efficiency, and safety. By keeping the oil fresh, you can extend the life of the engine, maintain its efficiency, prevent costly repairs, and ensure that the generator operates safely and reliably. While oil changes are a simple and inexpensive task, they offer significant benefits in the form of enhanced engine health and overall performance. If you’re unsure of when or how to change the oil, or if you’re experiencing problems with your generator, a power equipment repair shop in Bells, TN can provide the expertise you need to maintain your equipment. Proper oil maintenance will help you get the most out of your generator, ensuring that it remains a valuable and reliable tool for years to come.
As the days grow longer and the temperature rises, spring presents the perfect opportunity to rejuvenate your lawn. Whether your grass has been a victim of winter’s harsh conditions or it’s just showing signs of neglect, revitalizing your lawn can be a satisfying and rewarding endeavor. Achieving that lush, green look everyone desires for their yard requires a bit of effort, attention to detail, and the right tools. In this post, we’ll cover expert advice on how to bring your lawn back to life and ensure it thrives throughout the season.
The Importance of Spring Lawn Care
Spring is a time of renewal, and your lawn is no exception. After the cold winter months, the soil is often compacted, and grass is dormant. The first step in revitalizing your lawn is understanding why spring care is essential. During the winter, your lawn may experience issues like patchy grass, dead spots, or weeds taking hold in areas with thinning turf. Spring provides a fresh start for your lawn, as the temperatures begin to rise, allowing grass to grow again and giving your lawn the best chance for a healthy, vibrant look.
Caring for your lawn in the spring ensures that it gets a head start in the growing season. Regular maintenance during this time not only helps the grass grow stronger but also prepares it to withstand summer’s heat and drought. By nurturing the lawn now, you set the foundation for a beautiful outdoor space that will flourish all year long.
Prepare Your Lawn Equipment for the Season
To successfully revitalize your lawn, you must ensure that your tools are up to the task. Lawn care requires various pieces of equipment, such as mowers, trimmers, and aerators. However, tools that haven’t been properly maintained may not function efficiently, or worse, may break down halfway through a job. Taking the time to service and repair your equipment can make a huge difference in the ease and quality of your lawn care.
For instance, mowers should have sharp blades to cut the grass cleanly without tearing it, as ragged cuts can make your lawn more susceptible to diseases. Trimmers and edgers should also be in good working order, providing clean lines and neat edges. If you live near Bells, TN, visiting a Power Equipment Repair Shop in Bells, TN, can help ensure that your equipment is tuned up and ready to go. Many repair shops also offer seasonal check-ups, so make sure to give your tools a thorough inspection before beginning your lawn care routine.
Additionally, don’t forget to clean and lubricate your equipment. Grass clippings and dirt can build up on blades and moving parts, reducing the performance of your tools. Regular maintenance will not only extend the life of your equipment but will also allow you to complete the work with greater ease and efficiency.
Lawn Aeration: A Crucial First Step
One of the most important things you can do for your lawn in the spring is aeration. Aerating your lawn means creating small holes in the soil to allow air, water, and nutrients to penetrate deeper into the root zone. Over time, the soil can become compacted, especially after a wet winter or heavy foot traffic. Compacted soil restricts root growth and makes it difficult for grass to access the necessary nutrients and moisture it needs to thrive.
There are several methods of aerating a lawn, from manual tools to professional-grade machines. A popular option is to use a lawn aerator that pulls plugs of soil out of the ground, leaving small holes that help break up the compacted earth. If you’re not sure how to go about aerating your lawn or don’t own an aerator, many local lawn care services or garden centers offer rental options. You could also visit a Power Equipment Repair Shop in Bells, TN, where they may rent or service aerating machines.
Once you’ve aerated your lawn, you’ll notice improved drainage and better root development, which will help your grass grow stronger and more resilient as the season progresses. Aeration is particularly important for lawns with heavy clay soil or thatched layers, as it improves soil structure and promotes healthier grass.
Fertilizing Your Lawn for Optimal Growth
Fertilizing your lawn is essential for providing the nutrients it needs to thrive. As grass begins to grow again in the spring, it requires a boost of nutrients to help it grow thick, green, and healthy. Nitrogen, phosphorus, and potassium are the key nutrients to look for in your fertilizer. Each of these components supports different aspects of growth—nitrogen helps with the development of lush, green grass; phosphorus promotes root growth; and potassium increases the plant’s overall strength and resilience to disease and drought.
Spring is an ideal time to apply a balanced fertilizer, but be careful not to overdo it. Over-fertilizing can lead to excessive growth and may make the grass more susceptible to pests and diseases. A good rule of thumb is to fertilize in early to mid-spring, when the grass is actively growing, but wait until the soil has warmed up to at least 55°F to avoid wasting fertilizer. Follow the instructions on the fertilizer label and ensure you spread it evenly across the lawn for consistent results.
In addition to synthetic fertilizers, organic options such as compost or well-rotted manure are excellent for enriching your soil and providing long-term benefits. Organic fertilizers improve soil structure, enhance microbial activity, and increase nutrient retention, creating a healthier lawn over time.
Overcoming Weeds and Pests
Weeds and pests are inevitable parts of lawn care, but with the right approach, you can keep them under control. Spring is when many weeds begin to emerge, so it’s important to act early to prevent them from taking over your yard. Pre-emergent herbicides are an effective way to stop weed seeds from germinating. These herbicides form a barrier on the soil surface, preventing weeds like crabgrass and dandelions from taking root.
However, if weeds have already made an appearance, you’ll need to address them with post-emergent herbicides or manual weeding methods. It’s important to choose herbicides that are suitable for your grass type and to apply them according to the manufacturer’s guidelines to avoid damaging your lawn. For those who prefer a more natural approach, hand-pulling weeds or using an organic weed killer can also be effective.
In addition to weeds, pests such as grubs, ants, and other insects can wreak havoc on your lawn. Pests often cause damage by feeding on grass roots or creating unsightly tunnels. To combat pests, it’s essential to monitor your lawn regularly. If you notice signs of pest infestation, such as brown patches or small mounds of soil, it may be time to apply an appropriate insecticide. Be mindful of the timing of pesticide applications to minimize the impact on beneficial insects like bees and butterflies.
Regular lawn inspections and early intervention will help keep your lawn healthy and free from weeds and pests. With diligent care, your yard will look pristine and inviting all season long.
Conclusion
Revitalizing your lawn for the spring requires a combination of good practices, timely care, and the right equipment. Aeration, fertilization, and weed control all play critical roles in helping your lawn grow lush and healthy. However, before you begin any of these tasks, make sure your lawn equipment is in top shape. Whether you visit a Power Equipment Repair Shop in Bells, TN, for a tune-up or do it yourself, well-maintained tools ensure that the job gets done efficiently and effectively.
By following these expert tips and staying proactive about lawn care, you’ll enjoy a vibrant, beautiful lawn that enhances the curb appeal of your home and provides a relaxing outdoor space for your family to enjoy. Start your lawn revitalization journey today, and watch as your yard transforms into the envy of the neighborhood this spring.
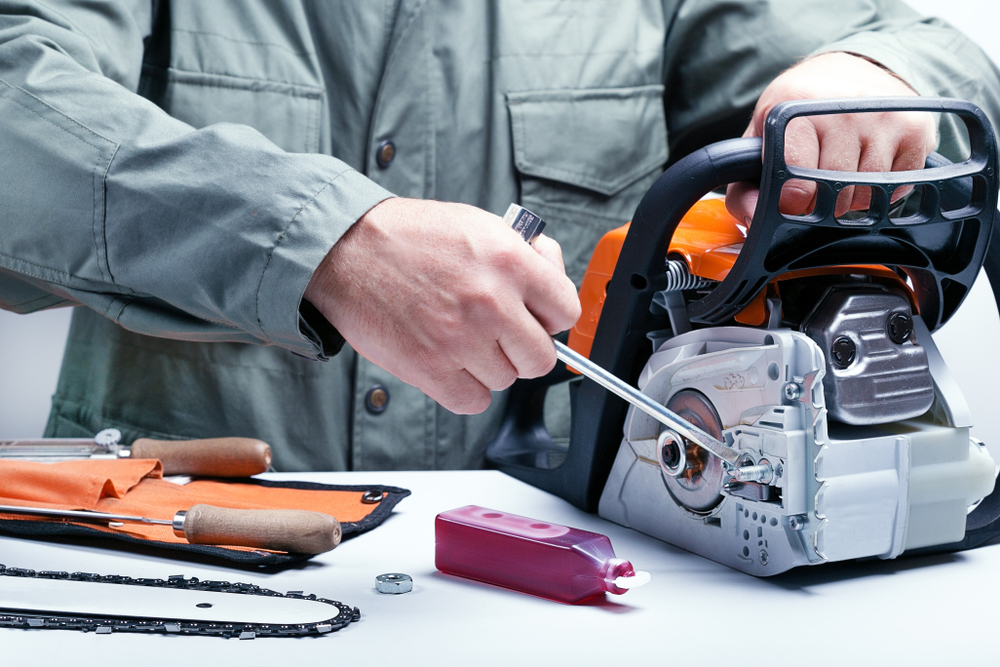
A chainsaw is an essential tool for many homeowners and professionals alike, whether you’re tackling a weekend yard cleanup, cutting firewood, or working on larger construction projects. Like any piece of machinery, however, a chainsaw requires proper maintenance to ensure its longevity and optimal performance. Whether you’re dealing with a gas-powered or electric chainsaw, taking care of this powerful tool can save you time and money in the long run. In this blog, we’ll explore various tips for maintaining and extending the lifespan of your chainsaw, with a focus on general maintenance practices and useful advice for keeping your chainsaw running smoothly for years to come.
Regularly Inspect and Clean the Chainsaw
The first step in chainsaw maintenance is regular inspection and cleaning. Keeping the tool clean prevents dirt and debris from interfering with its performance. After every use, it’s important to wipe down the body of the chainsaw, particularly the chain and bar, to remove any wood chips, sawdust, or other debris that could build up. This can improve the saw’s cutting efficiency and reduce unnecessary wear and tear. Additionally, a clean chainsaw runs cooler and more efficiently, preventing overheating and prolonging the life of critical components.
Before and after each use, inspect the chain for any damage. A damaged chain can cause issues such as poor cutting performance, increased vibrations, or even complete malfunction. Look for any cracks, bent links, or worn-out teeth. If you find any damage, it’s important to replace or sharpen the chain as needed to keep your chainsaw performing at its best. Furthermore, the chainsaw’s air filter should be cleaned periodically. A clogged air filter can reduce engine efficiency and potentially lead to overheating.
Proper Lubrication and Chain Tensioning
Lubrication is another essential aspect of chainsaw maintenance. A chainsaw requires oil to keep the moving parts, particularly the chain, properly lubricated. Without proper lubrication, the friction between the chain and bar increases, causing excessive wear, overheating, and premature damage. Most chainsaws have an automatic lubrication system that delivers oil to the chain as it operates, but this system must be maintained to function correctly. Ensure that the oil reservoir is filled with the proper chainsaw bar and chain oil before each use, and check the oil levels regularly to avoid running out during operation.
In addition to ensuring proper lubrication, it’s crucial to regularly check the chain tension. A chain that is too loose will cause the saw to perform poorly and may even fly off during operation, creating a safety hazard. On the other hand, a chain that is too tight can cause excessive strain on the engine, leading to faster wear on both the chain and the motor. Adjust the tension of your chain according to the manufacturer’s instructions to keep it in optimal condition. Many chainsaws have a tensioning screw that allows you to easily tighten or loosen the chain as needed.
Sharpen the Chain Regularly
A dull chain can drastically reduce your chainsaw’s cutting performance and efficiency. It is essential to sharpen the chain regularly to ensure that your saw is working as efficiently as possible. How often you need to sharpen the chain depends on the type of work you are doing. If you’re cutting through hard, dense wood or working on larger jobs, you’ll need to sharpen the chain more frequently. A general rule of thumb is to sharpen your chain every few hours of use or when you notice a decrease in cutting speed. You can either do this manually with a chainsaw file or with an electric sharpening tool. However, it’s important to be careful during this process, as an incorrectly sharpened chain can cause additional problems, including poor cutting performance and increased wear on the saw.
If you’re unsure about sharpening the chain yourself, it’s a good idea to visit a power equipment repair shop in Bells, TN, or your local chainsaw expert to have it professionally sharpened. Regularly sharpening your chain not only enhances cutting efficiency but also helps prevent unnecessary strain on the motor, contributing to the overall longevity of your chainsaw.
Check and Replace the Spark Plug
Just like any other small engine, the spark plug in your chainsaw plays a crucial role in starting the engine and keeping it running smoothly. Over time, spark plugs can become dirty or worn out, leading to starting issues, misfires, or reduced engine performance. To ensure that your chainsaw is always ready to go when you need it, it’s important to check and replace the spark plug regularly. Typically, spark plugs should be replaced every 100 hours of use, but this can vary depending on the model and usage. If you notice that your chainsaw is struggling to start or seems to be running roughly, it may be time to replace the spark plug.
When inspecting the spark plug, check for any signs of wear, such as corrosion or carbon buildup. If the plug is dirty, you can clean it with a wire brush to remove the debris, but it’s often better to replace the spark plug to ensure maximum efficiency. When replacing the spark plug, always use the one recommended by the manufacturer for your specific chainsaw model to ensure proper functionality.
Store Your Chainsaw Properly
Proper storage plays a critical role in extending the lifespan of your chainsaw. If you’re storing the tool for an extended period, such as during the winter months or between seasons, there are several precautions you should take to prevent damage. First, make sure that the chainsaw is thoroughly cleaned before storing it. This includes cleaning the chain, bar, and air filter, as well as checking the oil levels and emptying the fuel tank if you’re storing a gas-powered chainsaw.
For gas-powered chainsaws, it’s also a good idea to run the engine until it uses up all the fuel in the system. This will prevent stale fuel from gumming up the carburetor and causing starting issues when you bring the chainsaw back into use. Once the chainsaw is cleaned and the fuel is drained, store it in a dry, cool area away from direct sunlight or damp environments. A dedicated storage space, such as a shed or garage, is ideal, as long as the area remains dry and protected from extreme temperatures.
Additionally, if you’re storing a chainsaw for a long period, it’s important to remove the chain and bar from the tool. This helps prevent rust from forming on the chain and ensures that the saw is ready for use when you need it. Before reassembling the chainsaw after storage, inspect the chain and bar for any signs of damage or rust and replace them if necessary.
Conclusion
Maintaining and extending the lifespan of your chainsaw is all about routine care, attention to detail, and proper handling. Regular inspection, cleaning, lubrication, and sharpening will ensure that your chainsaw remains in peak condition, saving you both time and money in the long run. Taking care of the spark plug and storing the chainsaw properly when it’s not in use can also prevent unnecessary wear and help avoid costly repairs. If you find yourself unsure about the maintenance process, it’s always a good idea to consult with a professional at a power equipment repair shop in Bells, TN, or your local chainsaw expert. By following these tips, your chainsaw will continue to serve you well for years to come, allowing you to tackle your outdoor tasks with confidence and efficiency.